
Italian lupini beans are a healthy snack high in protein and fiber, low in fat, and a great low-carb year-round munch.
They are also a healthy addition to charcuterie or an Italian grazing board. Read on and learn how to make, store, and use them in various dishes.
My Italian grandmother would serve tasty lupini beans, amongst other delectable things, to keep the family entertained at the dinner table long after dessert. We often put them out with mixed nuts or olives for guests to enjoy on special occasions.
This once artisanal food has become a snacking favorite in the North American market, with Brami selling them as Keto-friendly plant protein packaged snacks.
When adequately soaked, I find this unique bean oddly addictive with its crunchy and hearty texture. Hopefully, this lupini beans recipe will convince you to make them at home because preparing them is not a complicated process—it's just fresh water, salt, and beans.
But I think they're worth your time because you can make a big batch for much cheaper, and you get to play around with the flavors and toss them into other recipes as a great source of protein.
All you need is a bit of patience because it takes about 5-7 days to transform these lupini beans into an edible snack, but the actual work involved is simple and easy. Let's have a look at how to prepare them properly.
Jump to:
What Are Lupini Beans
If you've never heard of them, they're legumes, more commonly known as Lupins, and very popular in the Mediterranean region. Many recipes use lupini beans, but they are more widely enjoyed as a seasoned or pickled snack. They also happen to be a great protein-rich and low-carb plant-based source.
What Do Lupini Beans Taste Like
- Some would say it is neutral in taste once you've removed all the bitterness. But when adding the right amount of salt to the brine, lupini beans are deliciously buttery and slightly salty with a little crunch.
- Some like to add vinegar or spices like garlic, etc. But my family's traditional lupini beans recipe adds just salt—similar to a lightly salted nut.
- I love their texture. Even when cooked and prepared, lupini beans should be tender yet firm, almost 'al dente, taking on whatever flavors you give them.
Ingredients & Notes
See the recipe card for full information on ingredients and quantities.
Here's what you need to make this lupini beans recipe:
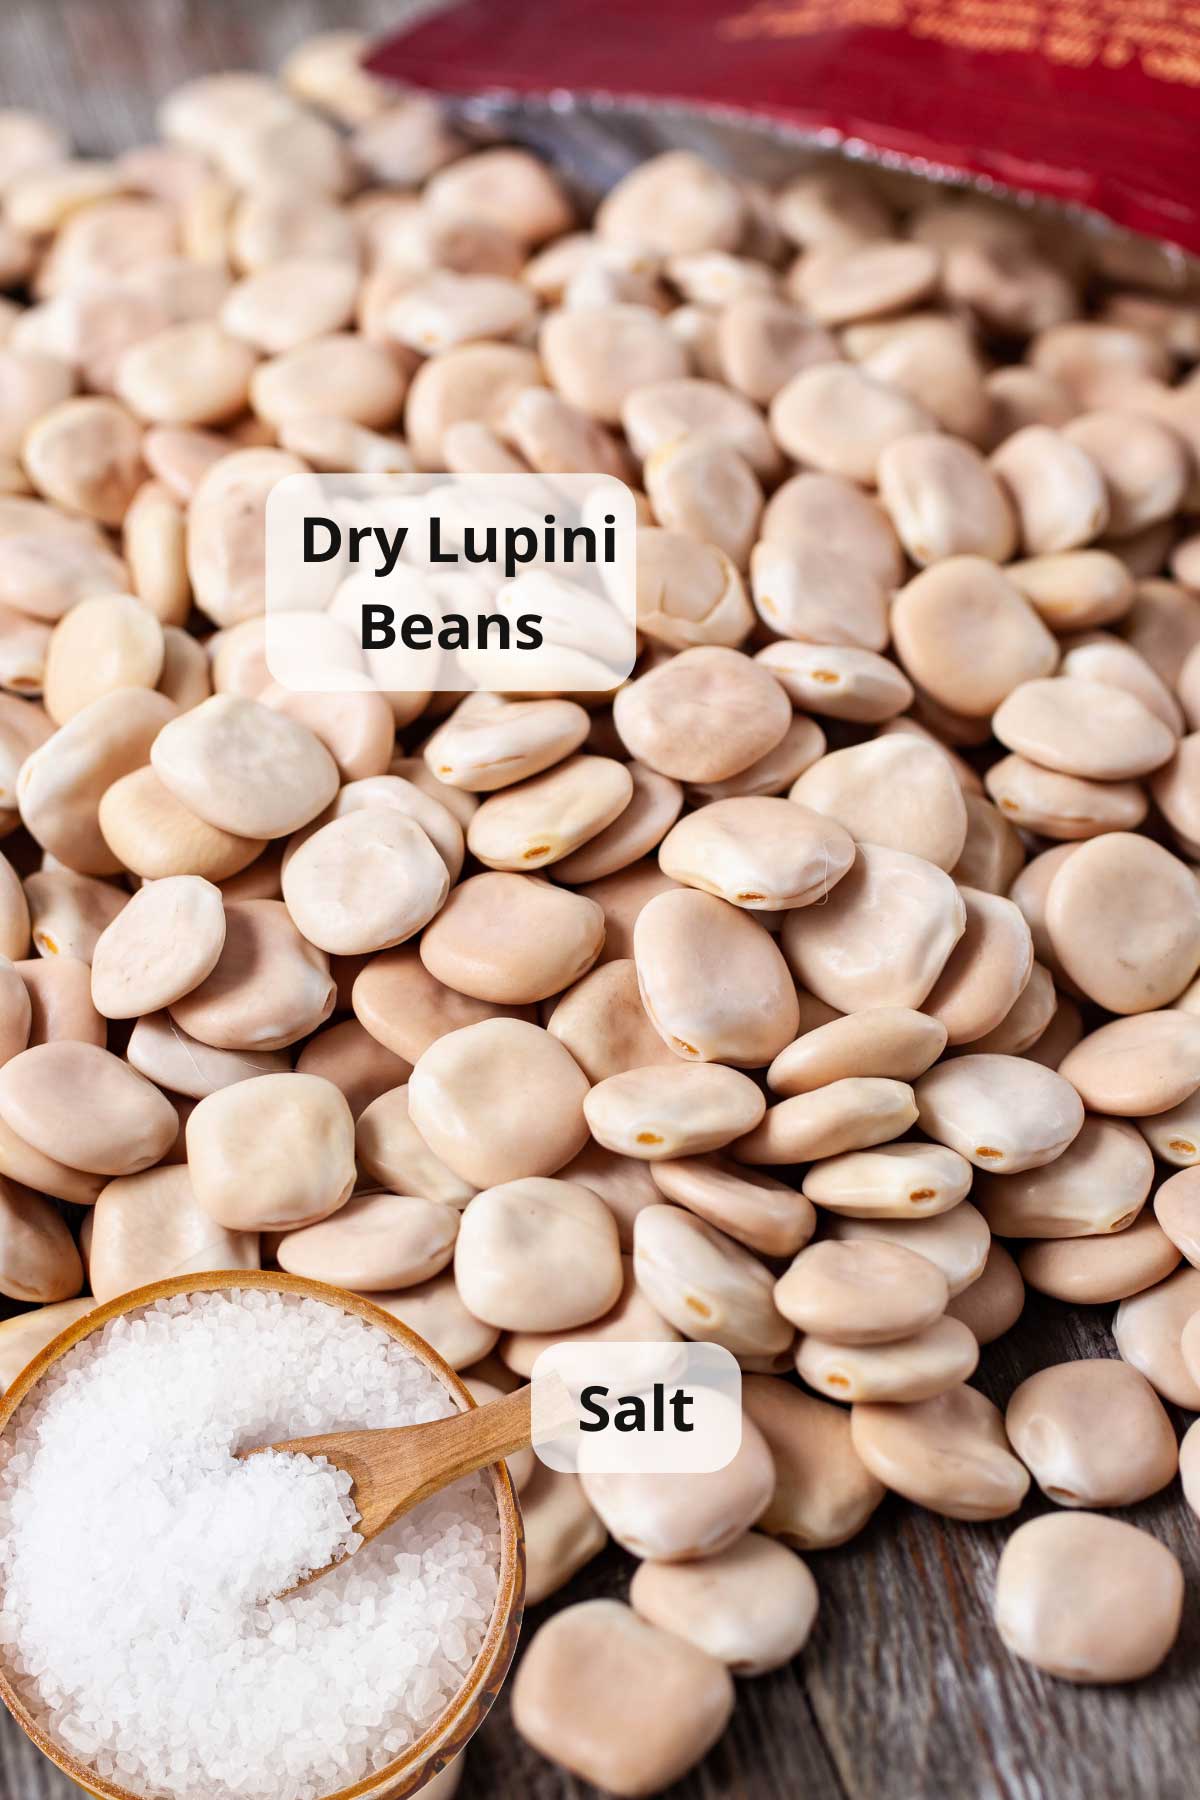
- Dry lupini beans: Because it is difficult to find them in grocery stores unless they are ready to eat, your best bet is to buy them online.
- Salt: Salt with water will create a brine solution to remove bitterness from the beans and get the right texture and taste.
How To Cook Lupini Beans
See the full recipe with measurements in the recipe card.
The short version of preparing lupini beans: Rinse and soak the beans overnight. The next day, drain and rinse. Place them in a large pot, covered with water, and simmer for 2 ½ hours on the stove. For another 4 to 7 days, drain and replace with fresh cold water twice a day—takes a few minutes—until the beans are no longer bitter.
Let's have a look at it step by step.
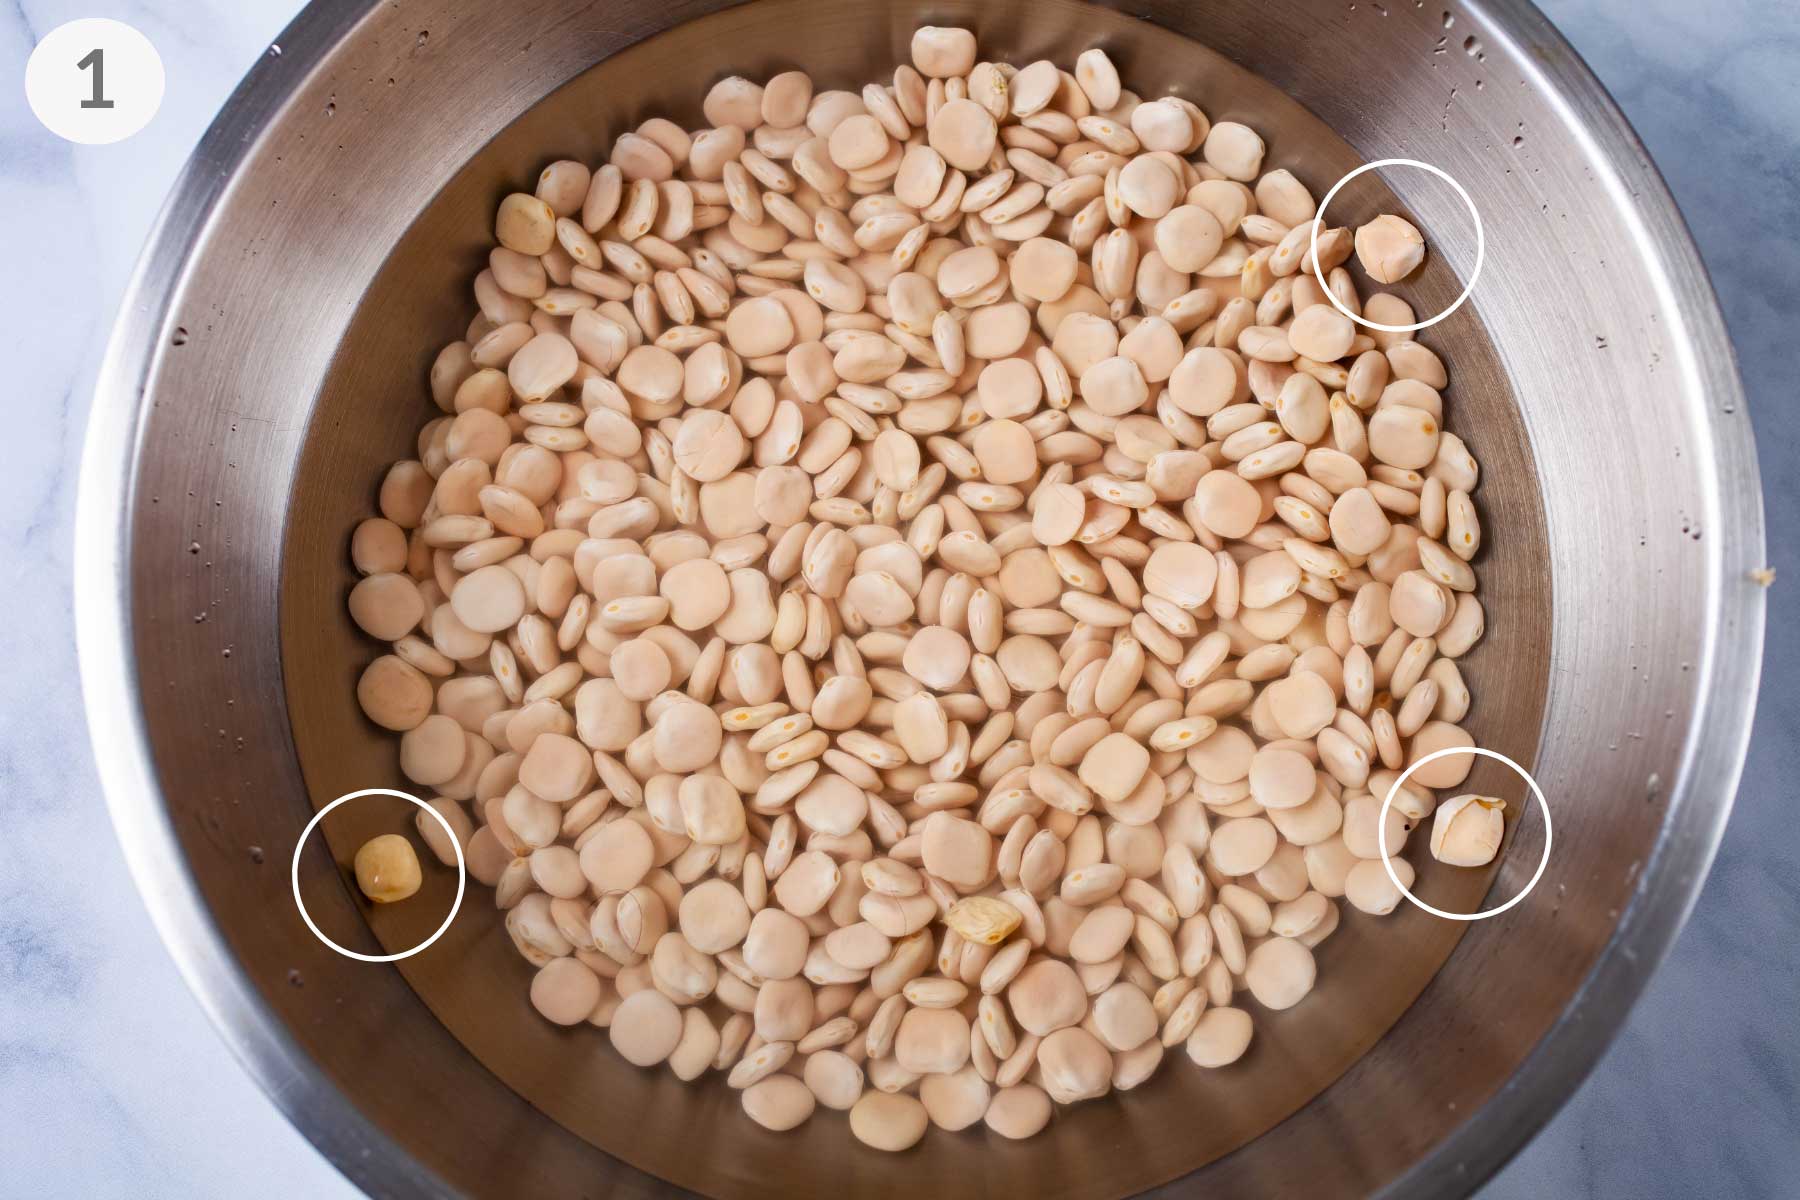
Step One (Picture 1 above) - Rinsing & Sorting: Rinse the dry beans and pick out any funny-looking ones. Throw away broken or cracked ones.
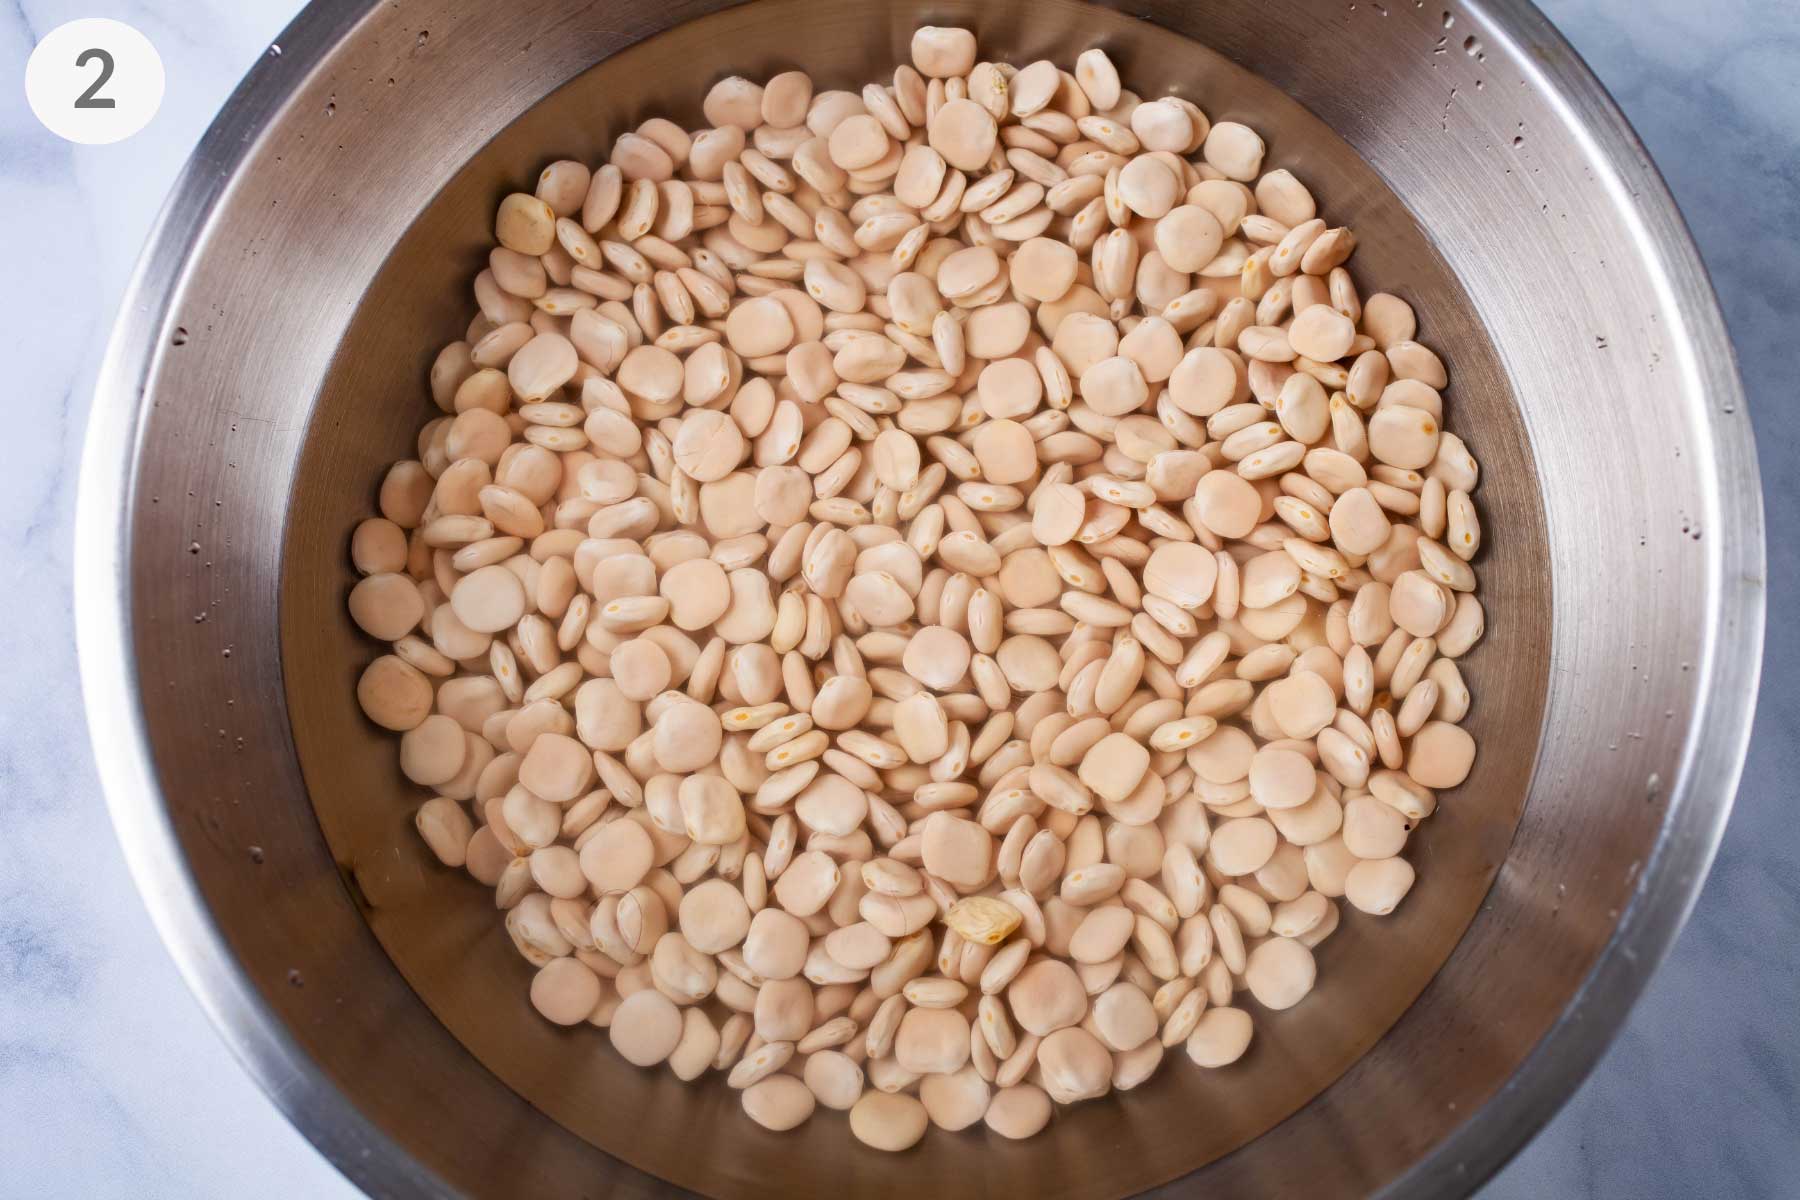
Step Two (Picture 2 above) - Overnight Soaking: Pre-soak the dried beans overnight in cool water, covered. Store it in a cool, dry place. Ensure the beans are submerged in the bowl or pot of water. Soak them overnight or until ready to attend to them the next day.
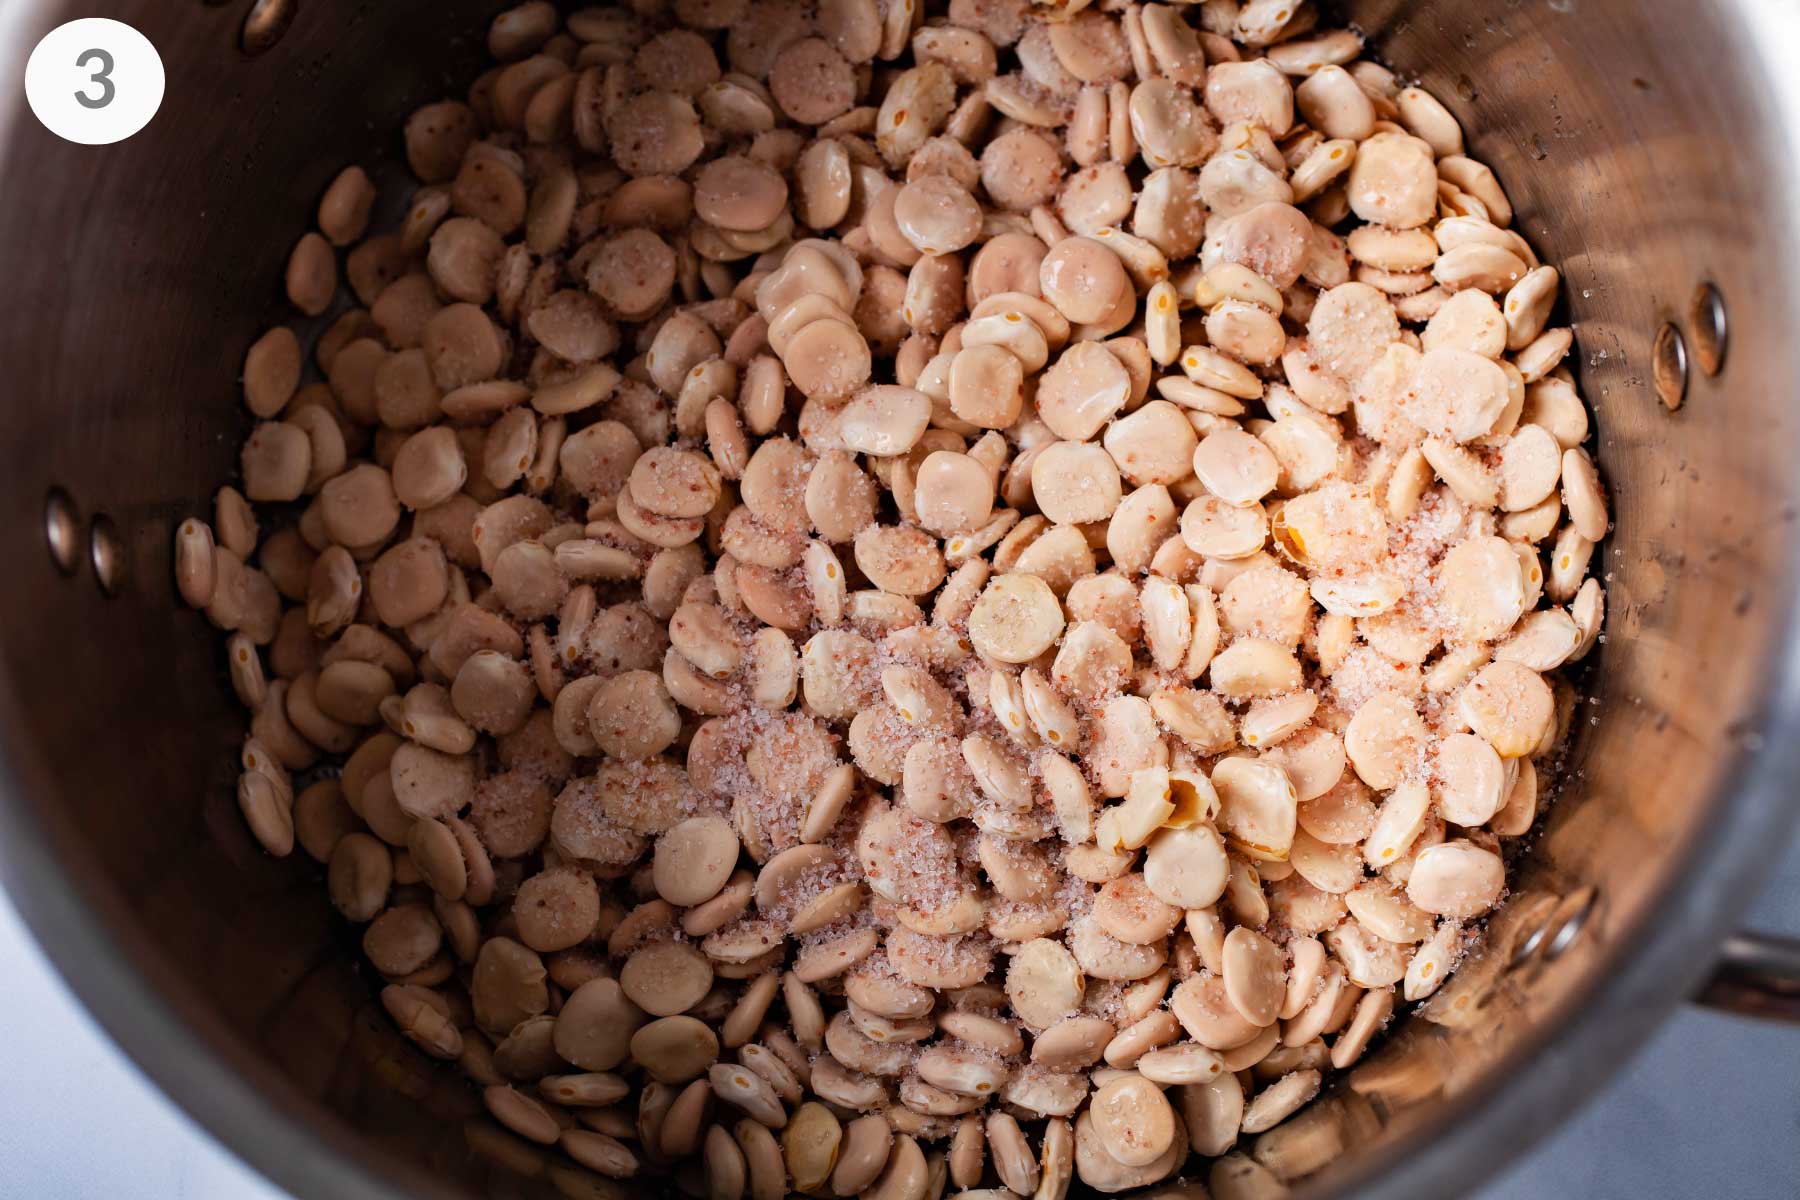
Step Three (Picture 3 above) - Cooking: Drain and rinse the beans. Return them to a cleaned stockpot large enough to hold the beans and submerge them in at least 3 to 4 inches of water because they will swell during cooking. Add salt (anywhere from one to 5 tablespoons, depending on the quantity). It's more so to help rid them of the bitter taste. Once the water reaches a good 'rolling boil' on high heat, lower it to maintain a gentle simmer for about 2 ½ hours.
Note: There is really nothing to it. I keep them on the stove while doing other things around the house, checking from time to time whether the beans are still covered with enough water—add more if too much has cooked away—or the simmer hasn't become too vigorous.
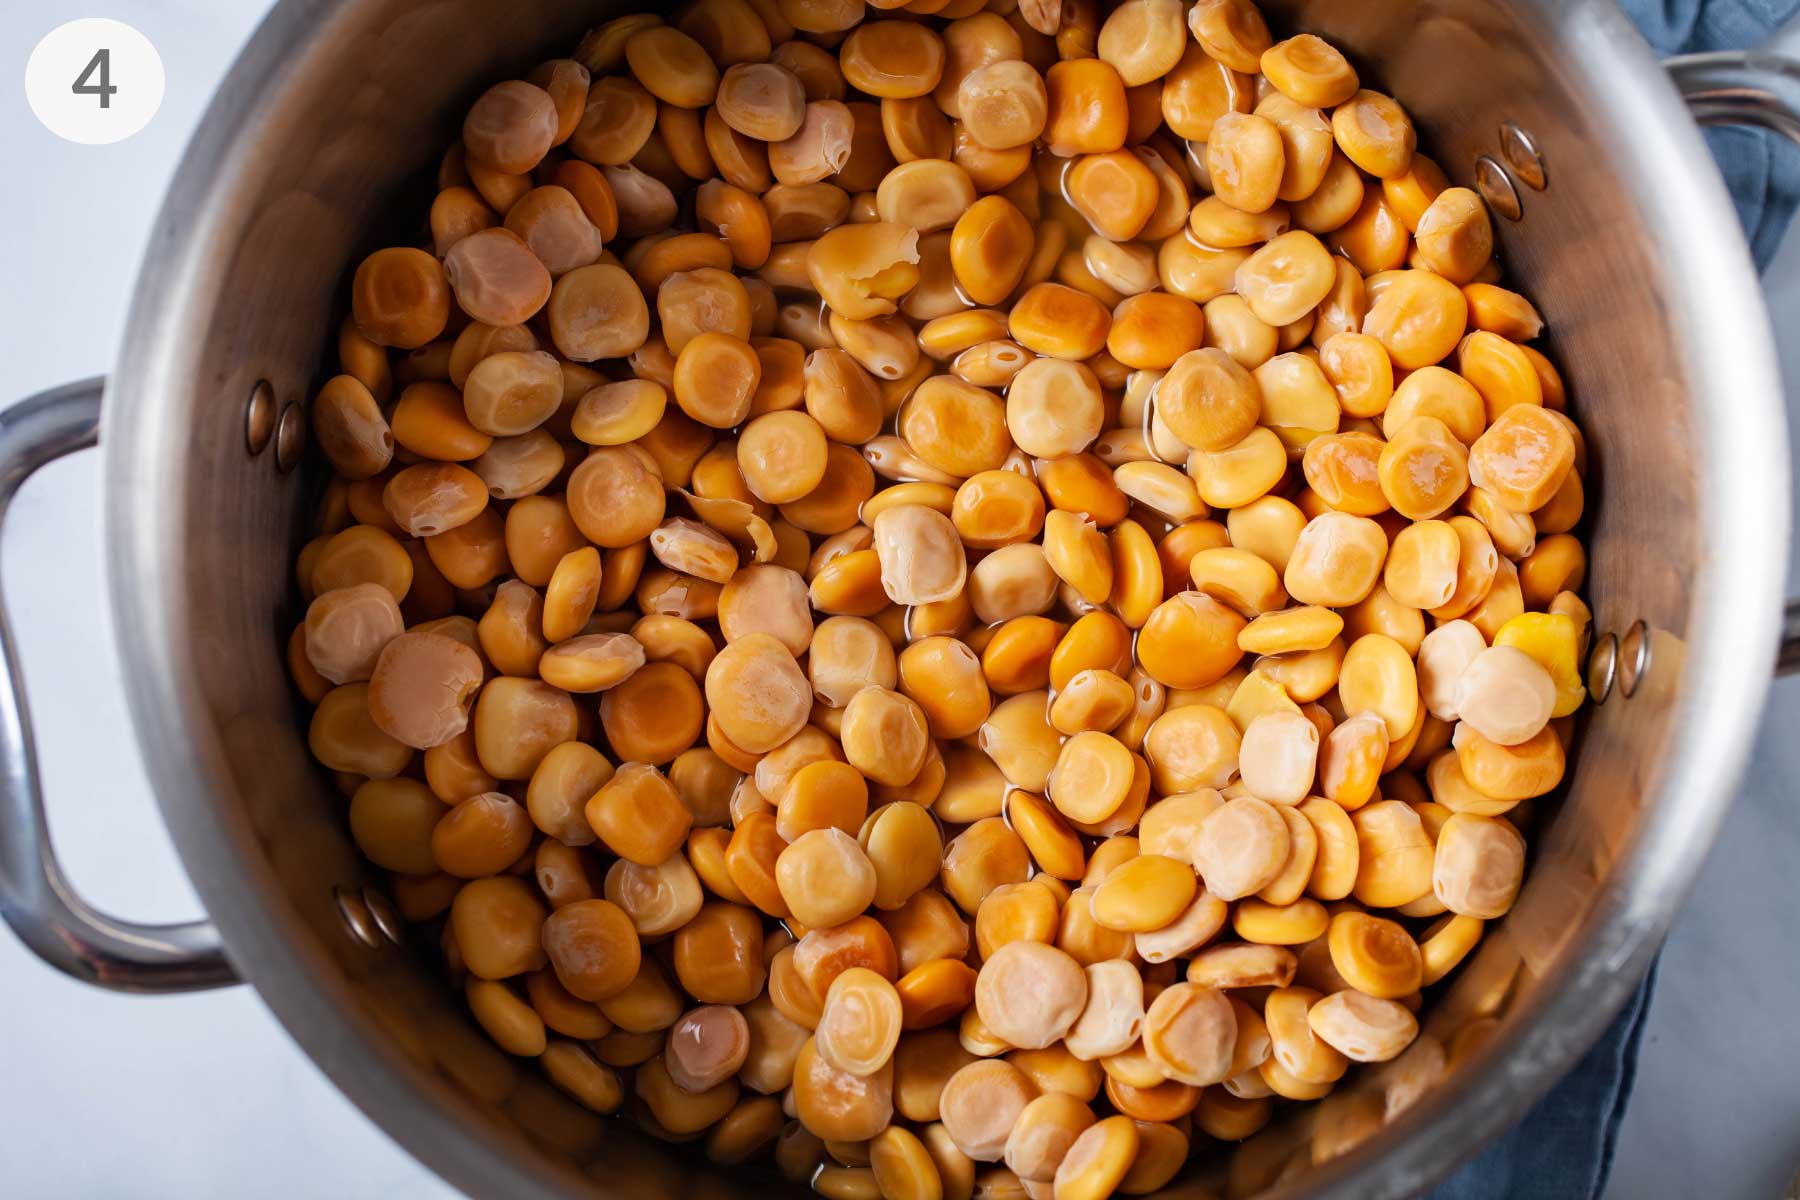
Step Four (Picture 4 above) - Soaking: After cooking, the beans will have changed to a more yellowish color and look plumper but still shriveled. Drain the beans to ready them for the soaking process. You can use the same rinsed and cleaned stockpot or a deep bowl. Whatever you have on hand that can hold the beans and enough water to cover them. Generously cover them in slightly salted water for 4 to about 7 days—or longer depending on the type of lupini bean—more on that later—replace water twice daily.
Note: Changing the salty water will only take a few minutes, and you can use a colander to drain the beans, cheesecloth, or whatever you have on hand. Every time you change the water, you will notice some murky residue around the pot's interior. I recommend rinsing it off, cleaning the pot before adding the beans back in, and submerging them with fresh salted water.
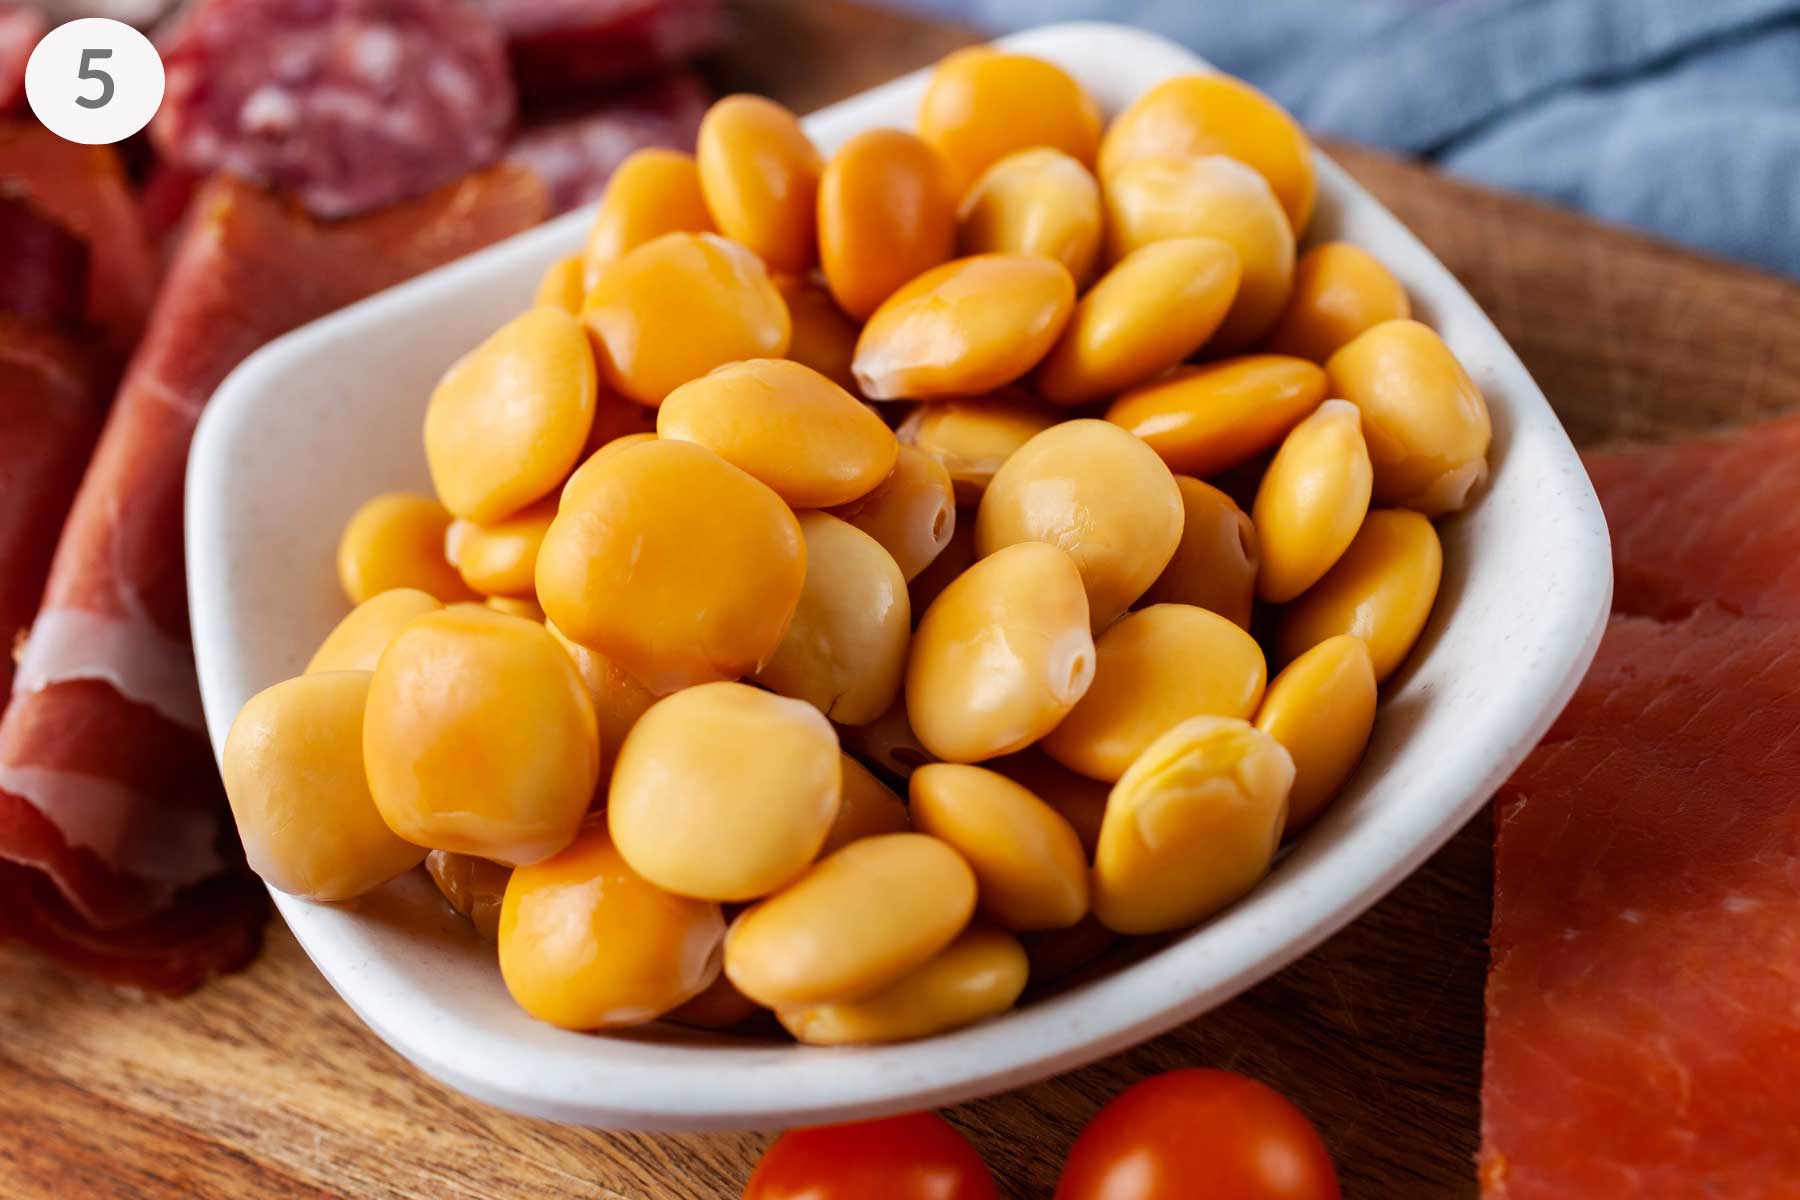
Step 5 (Picture 5 above) - Ready To Consume: The soaked beans will look beautifully plump and golden yellowish when ready. When they look ready after about 4 to 5 days, you can taste test a bean without swallowing it to see if any bitterness remains. If the bean is still slightly bitter, continue the rinsing, soaking, and salting process for a few more days before taste testing again. Noteworthy, there should be absolutely no bitterness.
How To Eat Lupini Beans
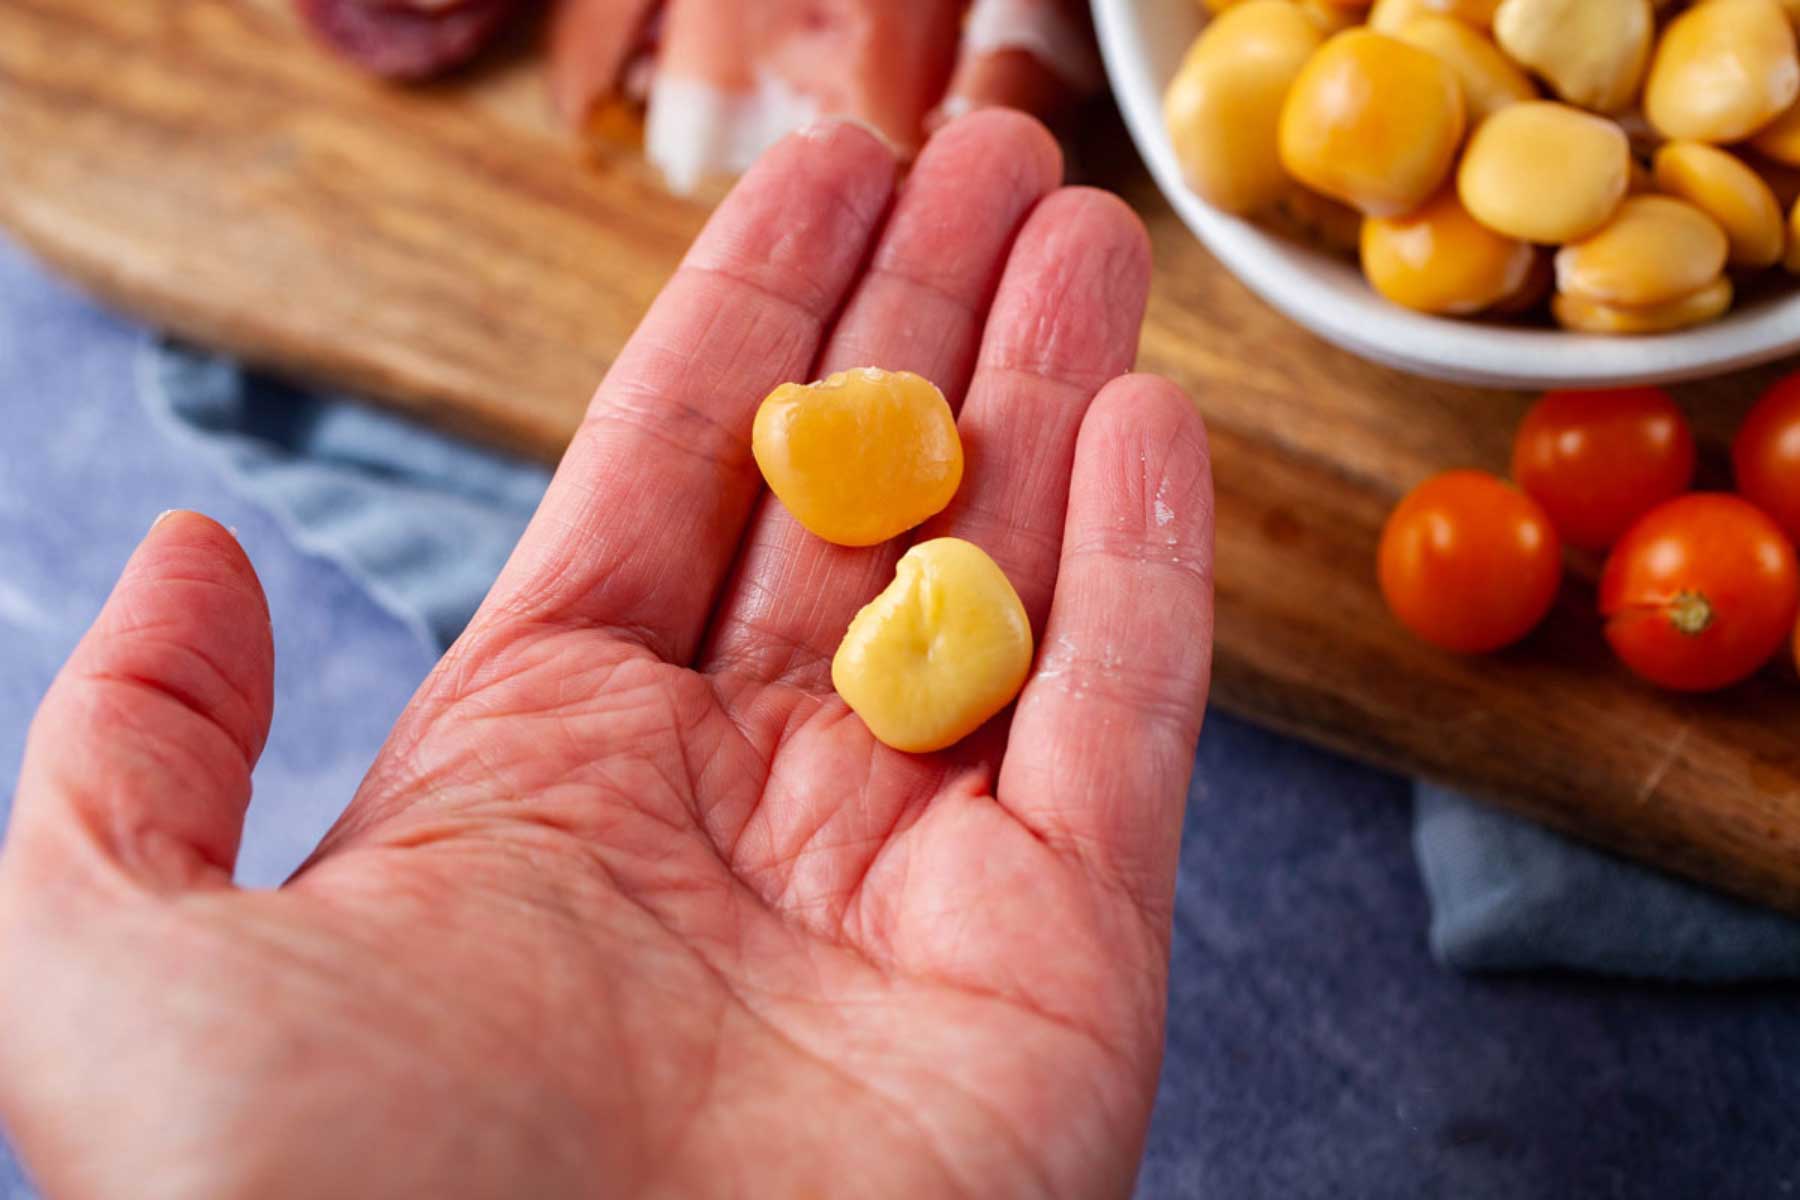
This part always reminds me somewhat of eating my grandmother's prepared sunflower seeds. I know it's going to sound tedious. But I promise you, once you get the gist of it, it'll become second nature, and they'll pop in your mouth fast.
- Take one, and bite into the edge of the bean to make a small tear on its skin (the outer layer).
- Then, pop the inner bean out into your mouth with your thumb and index finger and discard the skin.
- That's it!
At home, I always serve an extra empty bowl to trash the casings.
Helpful Tips
- Equipment: Usually, when I make lupini beans, I make a big batch, so I prefer to use a big stockpot with a lid and then store it in a dry, cool place. But depending on the quantity, I've also used a large bowl covered with a clean kitchen towel. Either way will work.
- Cleaning your pot: Every time you change the water, you will notice some murky residue around the pot's interior. Always place the beans back in a clean vessel when refilling them with cold water and salt.
- Have patience: Preparing a batch of lupini is not difficult, but it involves a few steps and a bit of patience. I'll do the initial steps during the weekend or on days I know I'll be working from home. Then, the additional soaking and rinsing need to happen only twice a day for about 4 to 7 days and can be done in the mornings and before going to bed. It might seem all a bit cumbersome, but, I promise, the actual work involved is simple.
Serving Ideas
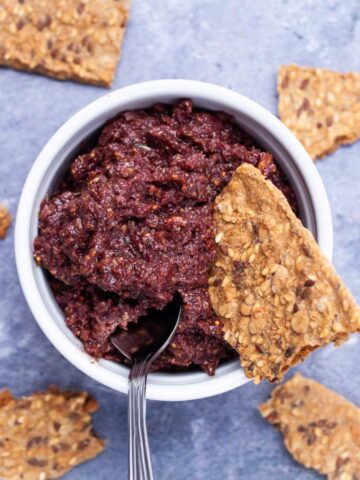
- These prepared beans are delicious on their own and served as a snack.
- Enjoy as a popcorn substitute during movie night.
- They are a lovely addition to cheese or an Italian grazing board in conjunction with thick-crust pizza squares, fennel and cucumber bites, or savory veggie cakes—to give you a few ideas.
- Try adding your favorite herb and spices, like a tad of salt, lemon juice, and chopped parsley, to add some zing, or try adding olive oil, garlic, and rosemary.
- You can use ready-to-eat lupini beans as an ingredient in other recipes, like keto hummus, lupini bread, or cookies. I even heard of ice cream but have never tried it myself.
- Or toss some peeled beans onto a salad.
Other Recipe FAQs
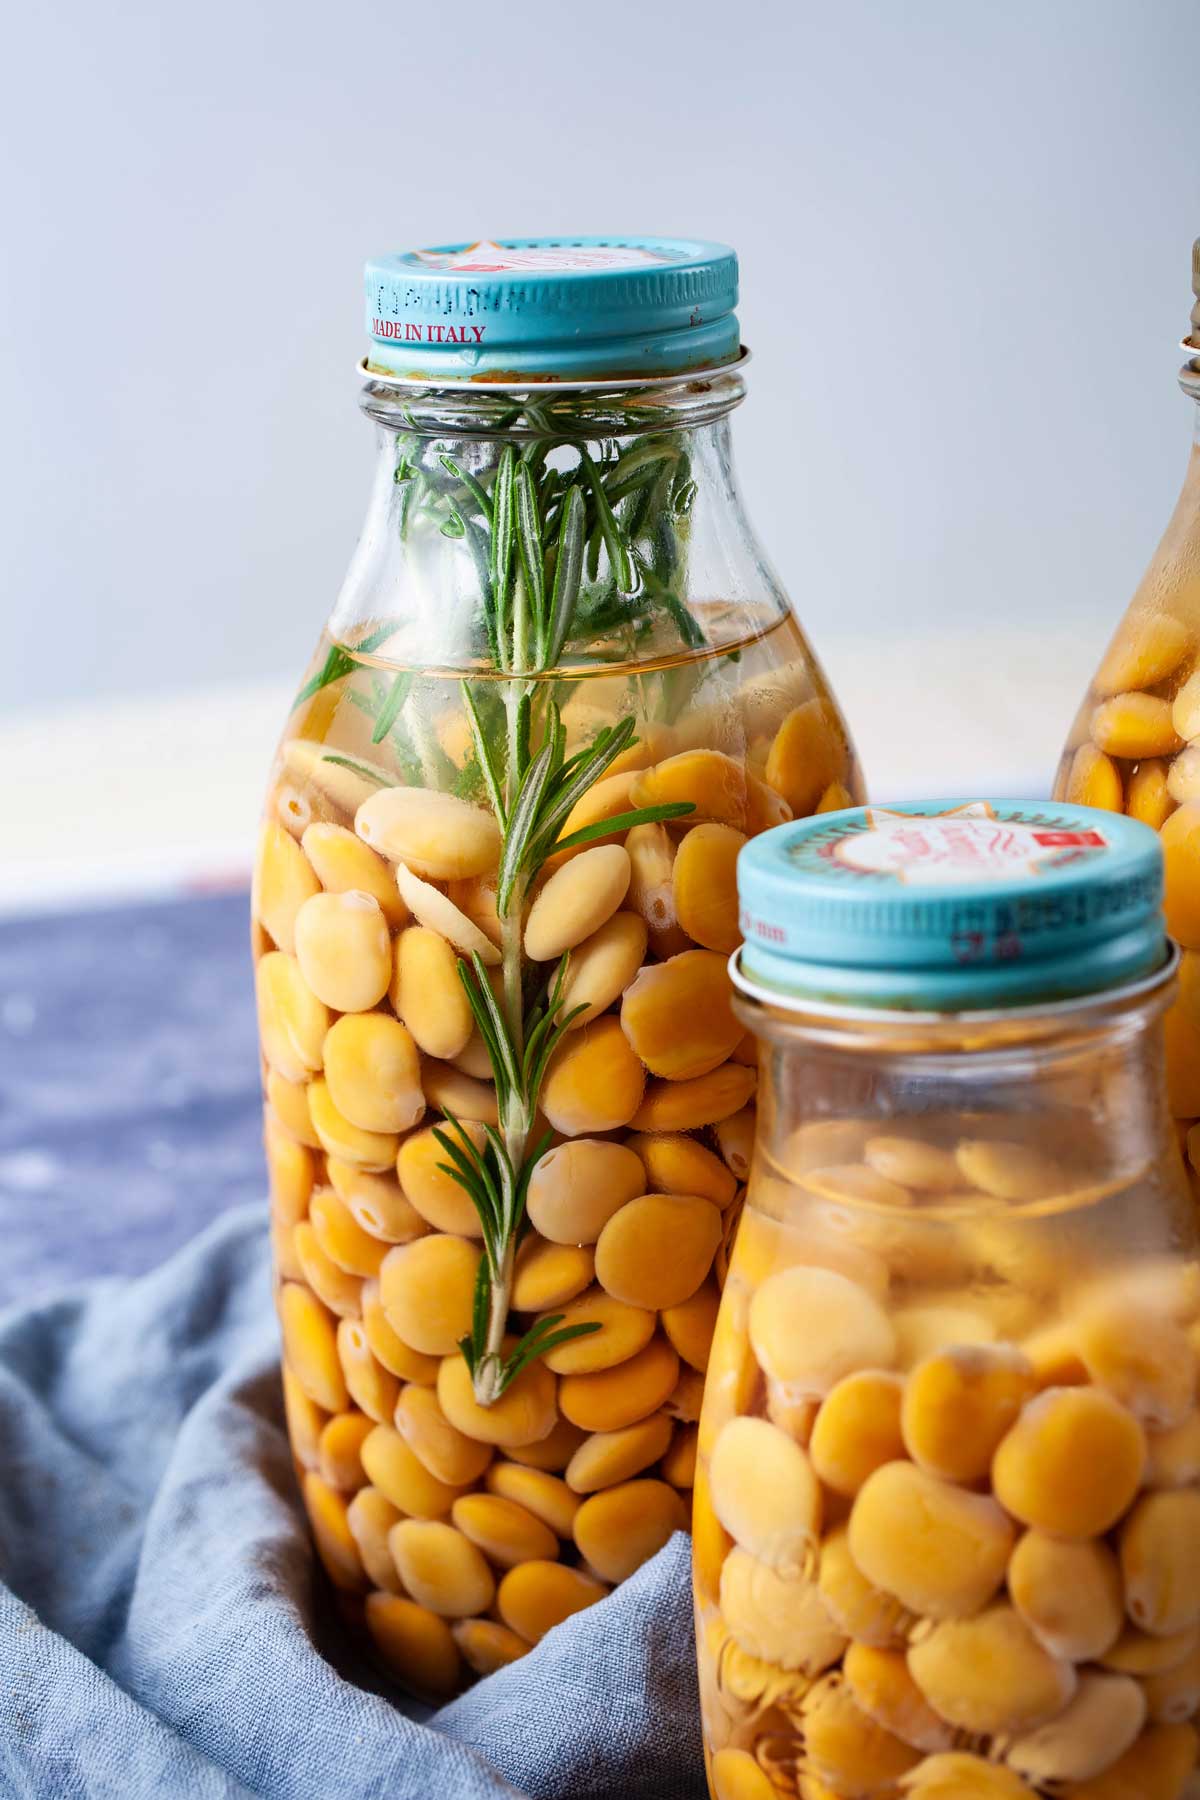
You can place the lupini beans in large glass mason jars or covered containers, leaving some room to submerge the beans with cold tap water.
I always add some salt—about one tablespoon per quart or liter of water. Maybe add some Rosemary leaves to add extra flavor to these ready-to-eat lupini beans, but it's optional.
Then refrigerate for up to two weeks. Drain the brined beans before serving. For a longer shelf-life, vacuum seal them.
The skin is absolutely edible. But when I enjoy them like a salted nut, I prefer to peel them and pop the lupini bean out of its outer shell.
I use the whole bean with its skin for other lupini bean recipes where it just becomes one of the ingredients, like lupin hummus or low-carb lupin bread.
A jar of lupini beans is pre-processed and safe to eat. They are thoroughly cooked and immersed in brine before being sealed in the jar.
Dried lupini beans are hard, flat, circular, and rather pale in color. They'll have to be properly cooked and soaked to remove their alkaloids and get them to their buttery, plump, and golden-yellow deliciousness.
Unfortunately, I haven't found dried lupini beans in my local supermarkets. But they are easily bought online. Depending on where you live, you might find them in Italian or Mediterranean specialty stores as well.
Usually, I only buy a bag of dried lupini beans when I'm ready to make them in the next few weeks. But I imagine you can store them like any other dried bean, preferably in a cool, dry place.
These snackable beans have become more widely available over the years, even in most big chain grocery stores. Usually, you will find them in a jar, pickled in salty brine, or vacuum-packed and ready to eat.
But since you now know how to prepare this easy snack yourself, with a bit of patience, you can make them at home as a low-carb, vegan, gluten-free, low in calories, high-in-protein, and fiber-dense snackable treat—wow, that's a mouthful.
You have the large dry lupini beans. They are very bitter and require more soaking time—up to two weeks. And then you have the smaller kind of lupini bean—sometimes called the "sweet" lupini bean, but there is nothing sweet about them.
They just contain fewer bitter alkaloids and require less soaking. There is no wrong or the right kind. I prefer the large ones, as they taste more buttery to me once prepared. But it's a personal preference.
Preparing them is the same; only one bean requires less soaking time and is therefore ready in less time.
Other Recipes To Serve With Lupini Beans


Made this? Tell me how it went in the comments and leave a star rating below. I love to hear from you. And don't forget to subscribe to my monthly newsletter! — Mariska
Your shares and ratings are valuable to me and so much appreciated. They'll help me create more content you and others can enjoy!
Here you have it, everything you need to know to make this tasty bean, whether you enjoy it as a healthy snack or as the perfect side dish!
📖 Recipe

Lupini Beans
Mariska RamondinoIngredients
- 2 pounds extra large dried lupini beans about 1 kilo
- Water
- Salt
Instructions
- In a large pot or bowl, submerge the beans completely with water (at least 2 to 3 inches covered). Cover the bowl with a clean kitchen towel or the pot with its lid, then soak overnight or until ready to attend to them the next day.2 pounds extra large dried lupini beans, Water
- When ready to cook, rinse the beans, and remove any brown-colored ones.
- Place the lupini beans in a large pot and cover them again with enough water.
- Add 4 to 5 tablespoons of salt.Salt
- Cover the pot and place it on high heat to bring the water to a boil.
- Then immediately lower the heat to maintain a very gentle, almost bare simmer for 2 ½ hours. The beans will be softer and brighter in color but still have a firmness to them.
- Drain the beans and rinse under cold running water.
- Place the beans in a clean pot and submerge again with water, enough to cover them completely. Add salt (optional)—one tablespoon per quart/liter of water.
- Cover the pot and soak the beans for 4 to 7 days, stored in a cool dark place.
- During those days, drain and rinse the beans twice a day, each time placing them in a clean pot, covering the beans again with new water, and adding salt.
- After 4 to 5 days, taste a lupini bean without swallowing. If still bitter, continue the rinsing-salting process until the bitterness is gone.
- Store the beans in a jar covered with lightly salted water in the refrigerator for up to two weeks..
- Vacuum seal the beans for a longer shelf-life.
Notes
Add your own private notes
Whenever you come back to this recipe, you’ll be able to see your notes.
Nutrition (% Daily value)
Disclaimer: This nutritional data is calculated using third party tools and is only intended as a reference.
Deb says
Hello, I’ve read all the comments but don’t find an answer…I just soaked 4 pounds of dry lupin beans for 6 days and they’re delicious. But, I want to preserve them for longer time. You say to vacuum seal them…but what does that mean? Vacuum seal the jars cold and they will stay on the shelf for years? Put them into bags then seal…and is that shelf stable? It seems to me that they should be pressure canned, I’m finding answers all over the board on this subject. I have a canner, pressure cooker, vacuum sealer and a freeze dryer. Please clarify, thanks so much, Deb
Mariska Ramondino says
Hi Deb, I am happy you like your lupin beans. And, yes, I see your confusion. So, to get the maximum storage time you have a few options. 1) Freeze them. Place them in an airtight container or a freezer-safe bag. They can last up to 6 months. I would freeze them in smaller batches and leave some space at the top of your containers for expansion of the beans. But make sure to remove excess air to prevent freezer burn. 2) Yes, the other option is pressure canning/jarring and sealing under vacuum after canning. So, the jars need to be made sterile and the sterile environment held sealed by the vaccuum. Italian Cooks has a great article about pressure canning Lupini Beans (link included). Since you've already cooked them, simply read their suggestions on pressure canning lupini beans. If done correctly, they should stay good for about a year. I don't pressure can my lupin beans, since we consume them here fairly quickly. But I hope this information answers your question. Good luck and let me know how it goes!
Francine says
Do you flavor your final brining solution with any herbs, garlic, vinegar or lemon juice?
Mariska Ramondino says
Hi Francine, I usually keep it simple as I use some of the prepared beans to also make lupin bread or hummus (also on the blog) and that adds already additional flavors. But, you can certainly do so. Some like to add vinegar or garlic, some fresh rosemary or thyme leaves (my favorite), etc. But my family's traditional lupini beans recipe adds just salt—similar to a lightly salted nut. Feel free to experiment;)
Heidi Villahermosa says
How many months would it last if you store it in the freezer?
Mariska Ramondino says
Hi Heidi, I rarely freeze them, but I would say anywhere from 3 to 6 months.
Cathy Tonti says
What do you mean by vacuum sealing them? Can I place them in clean mansion jars with fresh, boiled salted water and listen for the familiar canning pop as the jars cool? I made way too many to consume in two weeks> 🙂
Mariska Ramondino says
Hi Cathy, it happens, but it's a good problem to have;) However, if you don't have a vacuum sealer for longer storage, I would just freeze them in a freezer-safe, airtight container drained and completely cooled for later use. Thaw in the refrigerator or at room temperature. Just make sure you properly seal the container. For the amount you know you are going to enjoy in coming two weeks, brine them and store in the fridge. Brining: You can place the lupini beans in large glass mason jars, leaving some room to submerge the beans with cold tap water. Add some salt—about one tablespoon per quart or liter of water; maybe add some Rosemary leaves to add some taste to these ready-to-eat lupini beans, but it's optional. Here are a few more ideas to enjoy them, besides the ones I already gave in the post: toss them in salads, pasta dishes, toss them in scrambled eggs for breakfast. They also can go into stew and soups at the end. Enjoy and let me know how it goes.
anna says
thank you for this thorough guide! I made these and I love them. Gifted some to friends too because I made a giant batch.
Mariska Ramondino says
Aww, thank you, Anna, for stopping by and letting me know. I am so glad this recipe worked out for you, and thank you for the recipe rating. It's greatly appreciated!
Kristi says
I am making these and I want to make sure I am doing what you ask lol.
WHEN can I eat these: After the 4-5 days or after being in the fridge for 2 weeks?
I looked at another website and they insinuated that they were only safe AFTER the 2 weeks in the fridge. Is your "in the fridge for 2 weeks" part of making these safe or is it so they don't perish?
Thanks
Mariska Ramondino says
Hi Kristi, the 2 weeks in the fridge are so they don't perish. However, you can keep them longer when you vacuum seal them. Regarding your question about when they are ready to eat, most of the time, my lupini beans are ready after soaking them anywhere between 4 to 7 days. But that is because I initially cook them longer. In step one of the recipe card, I first rinse and soak the beans overnight to reconstitute them. I leave the beans in a covered bowl submerged with water on the kitchen counter or anywhere at room temperature. Step 2: The next day, drain and rinse and remove any blemished ones. Then I cook and gently simmer the beans for 2 ½ hours on the stove until they get softer and obtain a brighter color. They will still be firm and still require the soaking and rinsing process but not as long. Then for another 4 to 7 days, drain and replace with fresh cold water at least twice a day (best 3) until the beans are no longer bitter. I never soak them in the fridge. Instead I usually leave them covered to soak in my pantry. If at day 4 or 5 you feel that they are soft and yellowish in color, you can taste test. Just don't swallow the bean. If it still tastes a bit bitter continue to rinse and soak a few days longer. They should taste tender, slightly sweet and almost buttery. Mine are usually ready at the 4 to 5 day mark, but I do change the water at least twice a day. I hope this helps, Kristi. Happy lupini making;) If you enjoyed this recipe, please leave a star-rating. It will help others find this recipe too. Thank you!
Heidi Kuharich says
I grew up eating lupini beans, but always prepared. Recently I spotted the dry beans at our local Italian grocer. Got me thinking...
I'm so excited to give this a try! My mom will be over the moon to eat homemade lupini beans!
My only sticking point: you peel them? I think my aunt does, but we never have.
Mariska Ramondino says
Hi Heidi, I am excited for you to make your own. They are addictive;) So, when it comes to eating them, you don't need to peel them, but I do. I peel them as I eat them, not in advance. It's like eating shelled seeds, you bite a small hole in the thin outer skin and pop the tender, yellow, fleshy bean inside directly into your mouth, discarding the skin. That's how I used to eat them as a kid and still do;) Eating the skin is a matter of personal preference. It's safe the eat it when prepared and it's actually rich in fiber. When making my lupini hummus, I don't peel them. Good luck and let me know how they turn out!