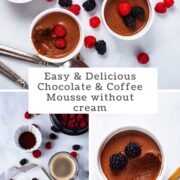

Treat yourself or your guests with this heavenly light and creamy chocolate coffee mousse recipe with only 5 ingredients—an easy-to-make, perfect dessert for chocolate and coffee lovers that looks and tastes luxurious.
This chocolate coffee mousse is my kind of treat. It comes together with simple ingredients, like my blended chocolate chia mouse, but the mousse mixture combines melted chocolate with lovely coffee flavors.
So, let's dig into the ingredients you'll need and some key steps to make this healthy and easy chocolate dessert to impress.
Looking for a quick vegan mousse? Then try this Chocolate Peanut Butter Mousse.
Jump to:
Why You'll Love This Easy Coffee Mousse Recipe
- This mousse is incredibly light yet also deliciously creamy.
- With only a few ingredients, you have a fancy sweet that only requires some chilling.
- Every spoon gives you a delicious dark chocolate flavor with sweet coffee maple undertones—perfect for small dinner parties, date nights, or any time you want to satisfy your chocolate cravings.
- It's made without gelatin or cream. Instead, I'm using only egg whites to make its texture light and fluffy.
- Depending on the choice of dark chocolate or sweetener, you can easily make this homemade mousse dairy-free, gluten-free, and Keto-friendly.
Ingredients & Notes
See the recipe card for full information on ingredients and quantities.
There are only five components to make this chocolate coffee mousse, with dark chocolate as one of the base ingredients—let's have a look.
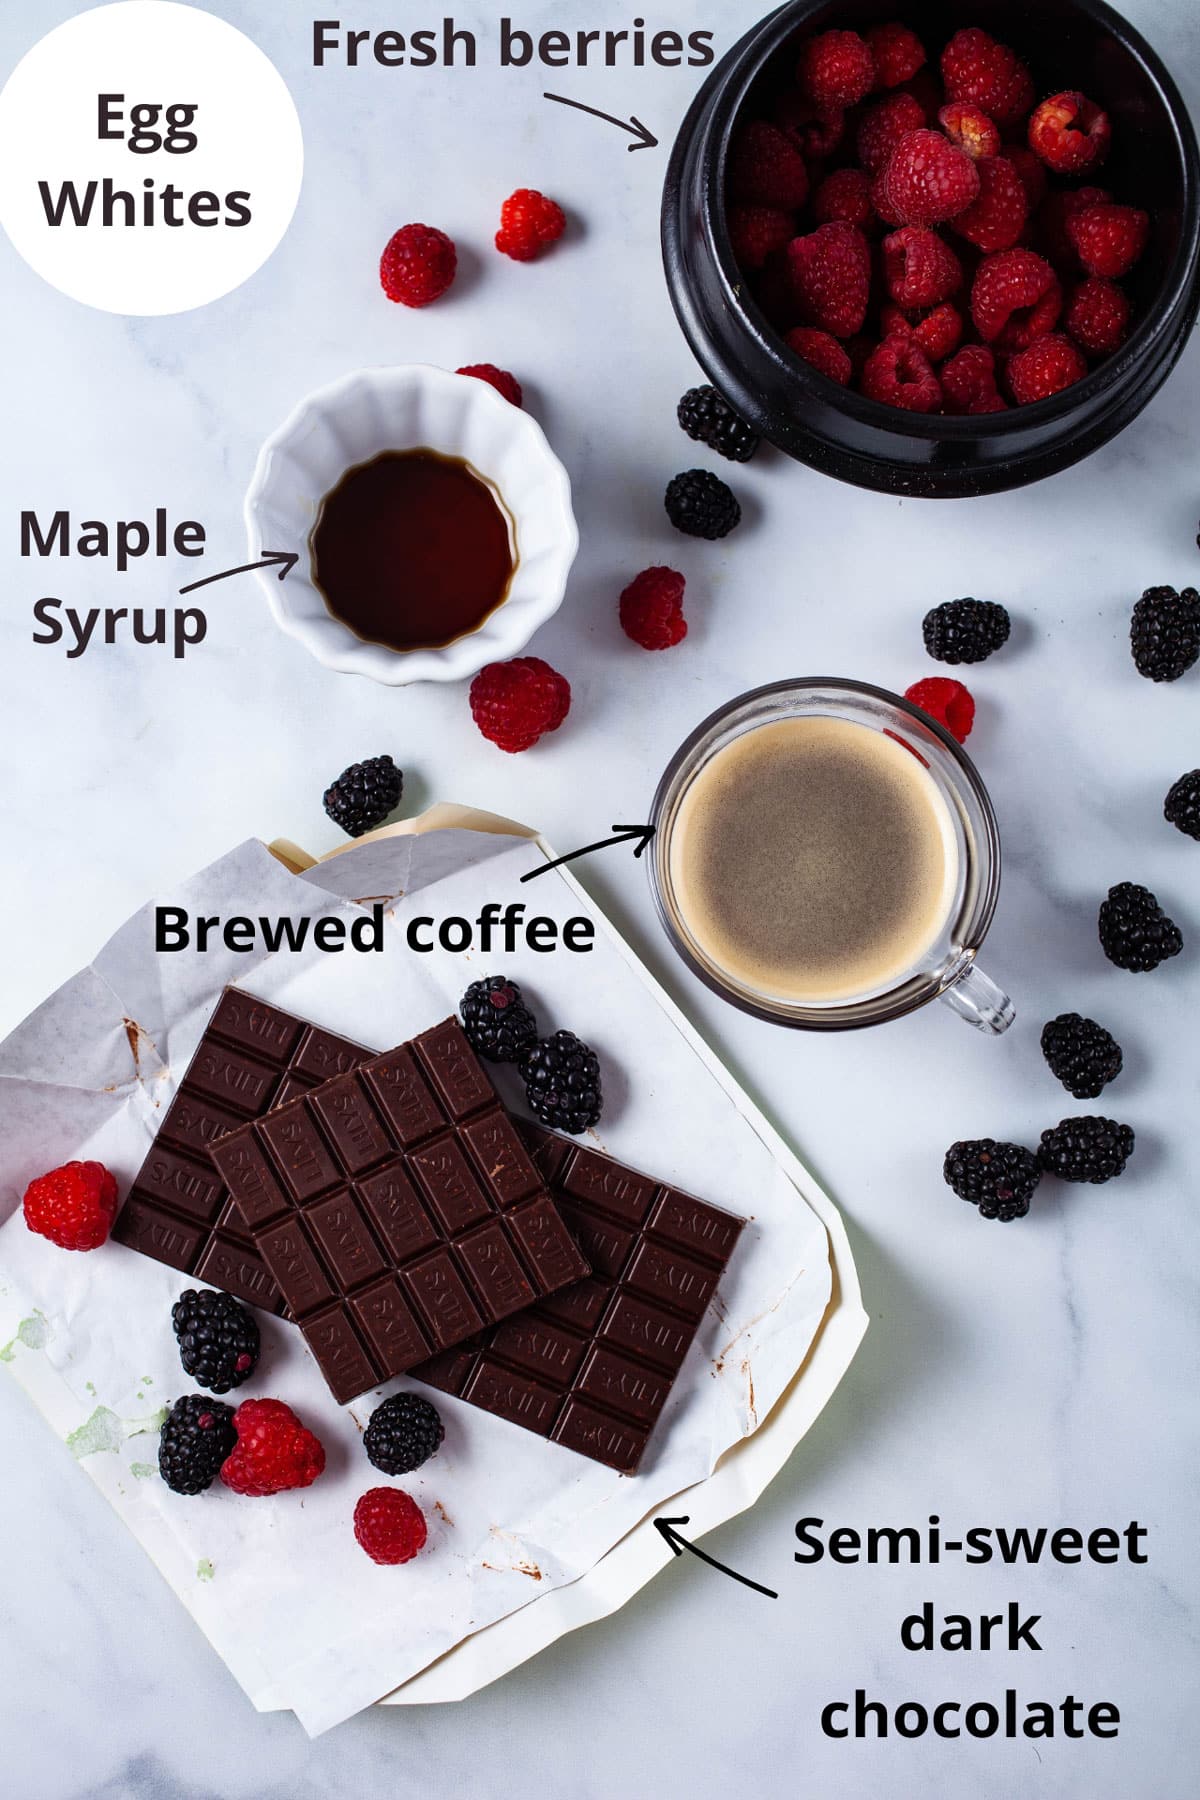
- Dark chocolate: Pick good-quality chocolate with high levels of cacao—anywhere from 70 to 80%. Go for 56% instead, If you are a sweet chocolate lover.
- Egg whites: The recipe calls for egg whites at room temperature, which means remove the eggs from the fridge and let them sit on the kitchen counter for about 30 minutes before using them— it helps beat egg whites properly to stiff peaks. You can use carton egg whites versus shelled.
- Maple syrup: One tablespoon is more than enough to add that touch of extra sweetness and caramelized undertones.
- Brewed Coffee: Pick your favorite coffee bean to make a strong black coffee. Half a cup will give you a decent coffee flavor, but you can tone it down to about three tablespoons for a slight hint of it. You can also use homemade cold-brew coffee.
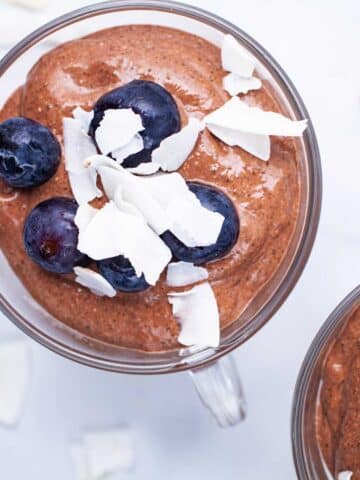
- Berries: You can use fresh or frozen. Although only used for garnish, I find them a must to take this chocolate and coffee dessert to the next level.
Note: You don't need any gelatin, heavy cream, or any other thickeners. It's an egg white chocolate mousse only.
How To Make It
See the recipe card for full information on ingredients and quantities.
Maybe it is one of the fastest coffee chocolate mousses you'll ever make. But for ten minutes, it does require your undivided attention.
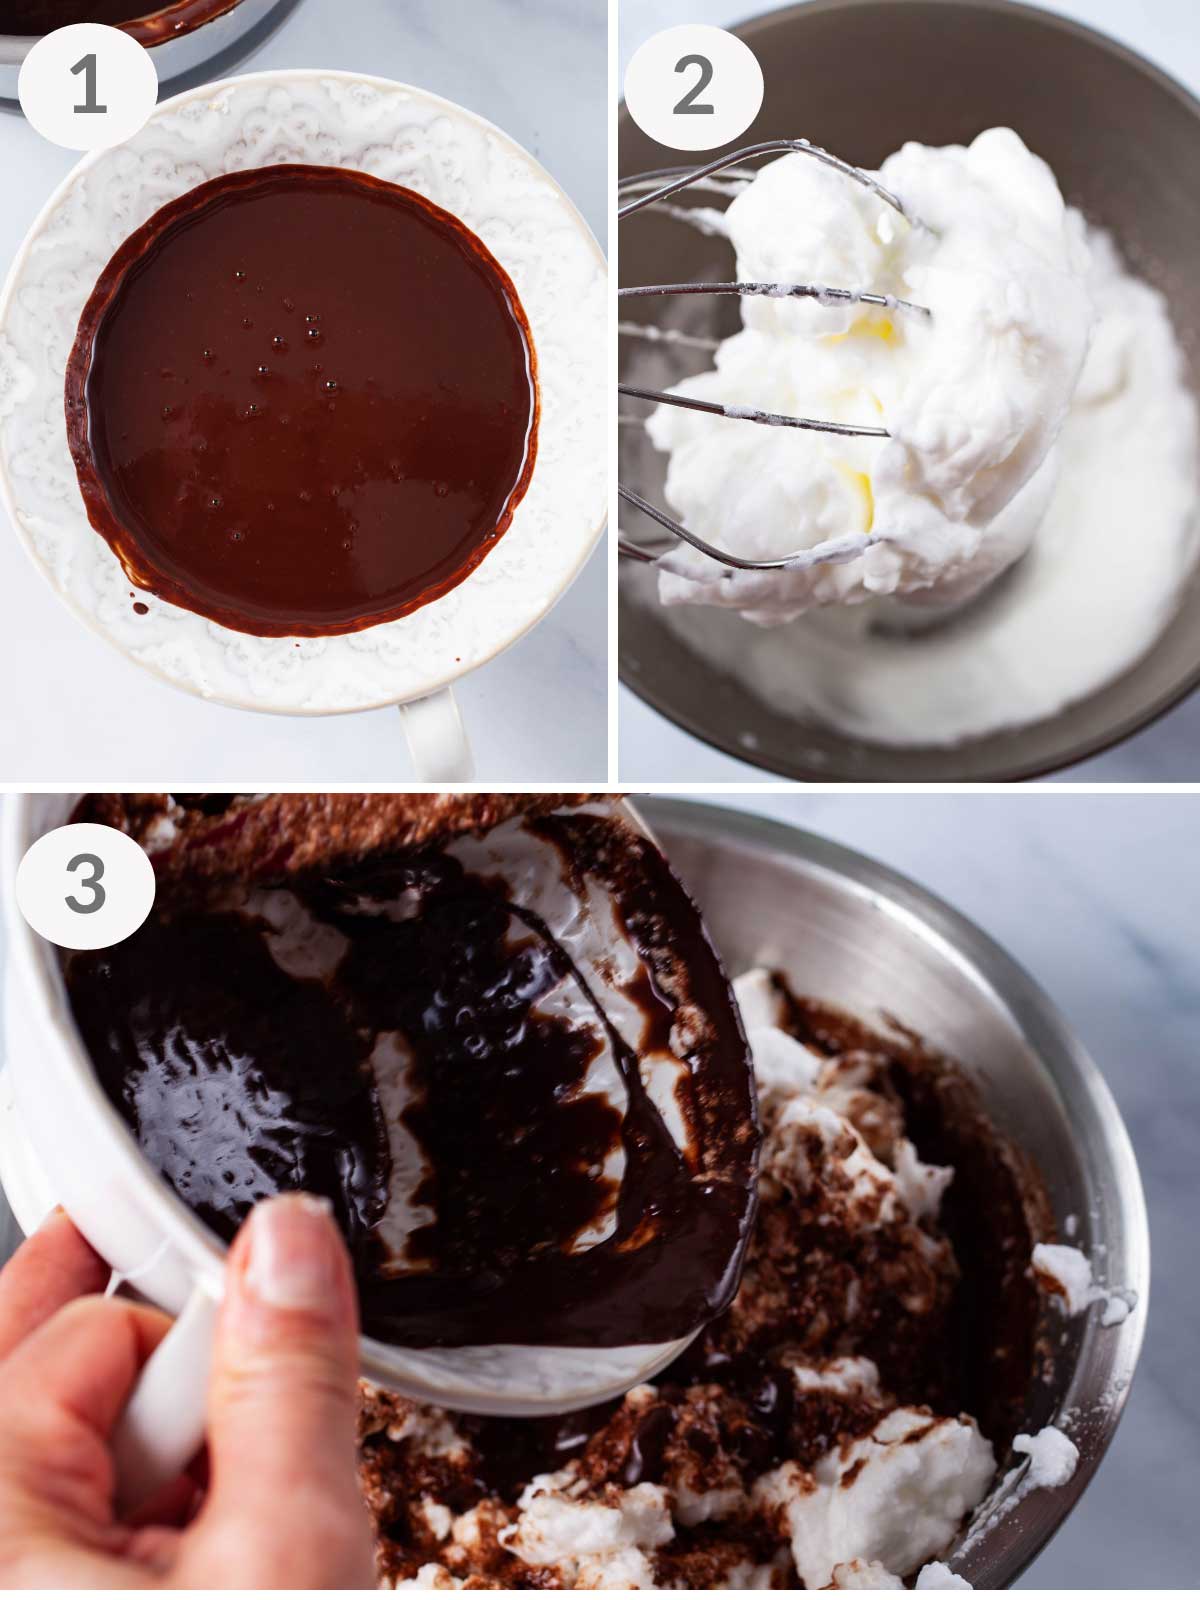
Step One (Picture 1 above) - Melt chocolate in a small saucepan over low heat. Stir in the maple syrup and the coffee. Remove from heat and reserve.
Step Two (Picture 2 above) - In a bowl of the stand mixer or food processor, beat your egg whites until stiff, meaning until peaks stand straight up when you lift your beater from the mixture (about 5 minutes on medium speed).
Step Three (Picture 3 above): When the white foam is ready, add the chocolate coffee mixture in increments.
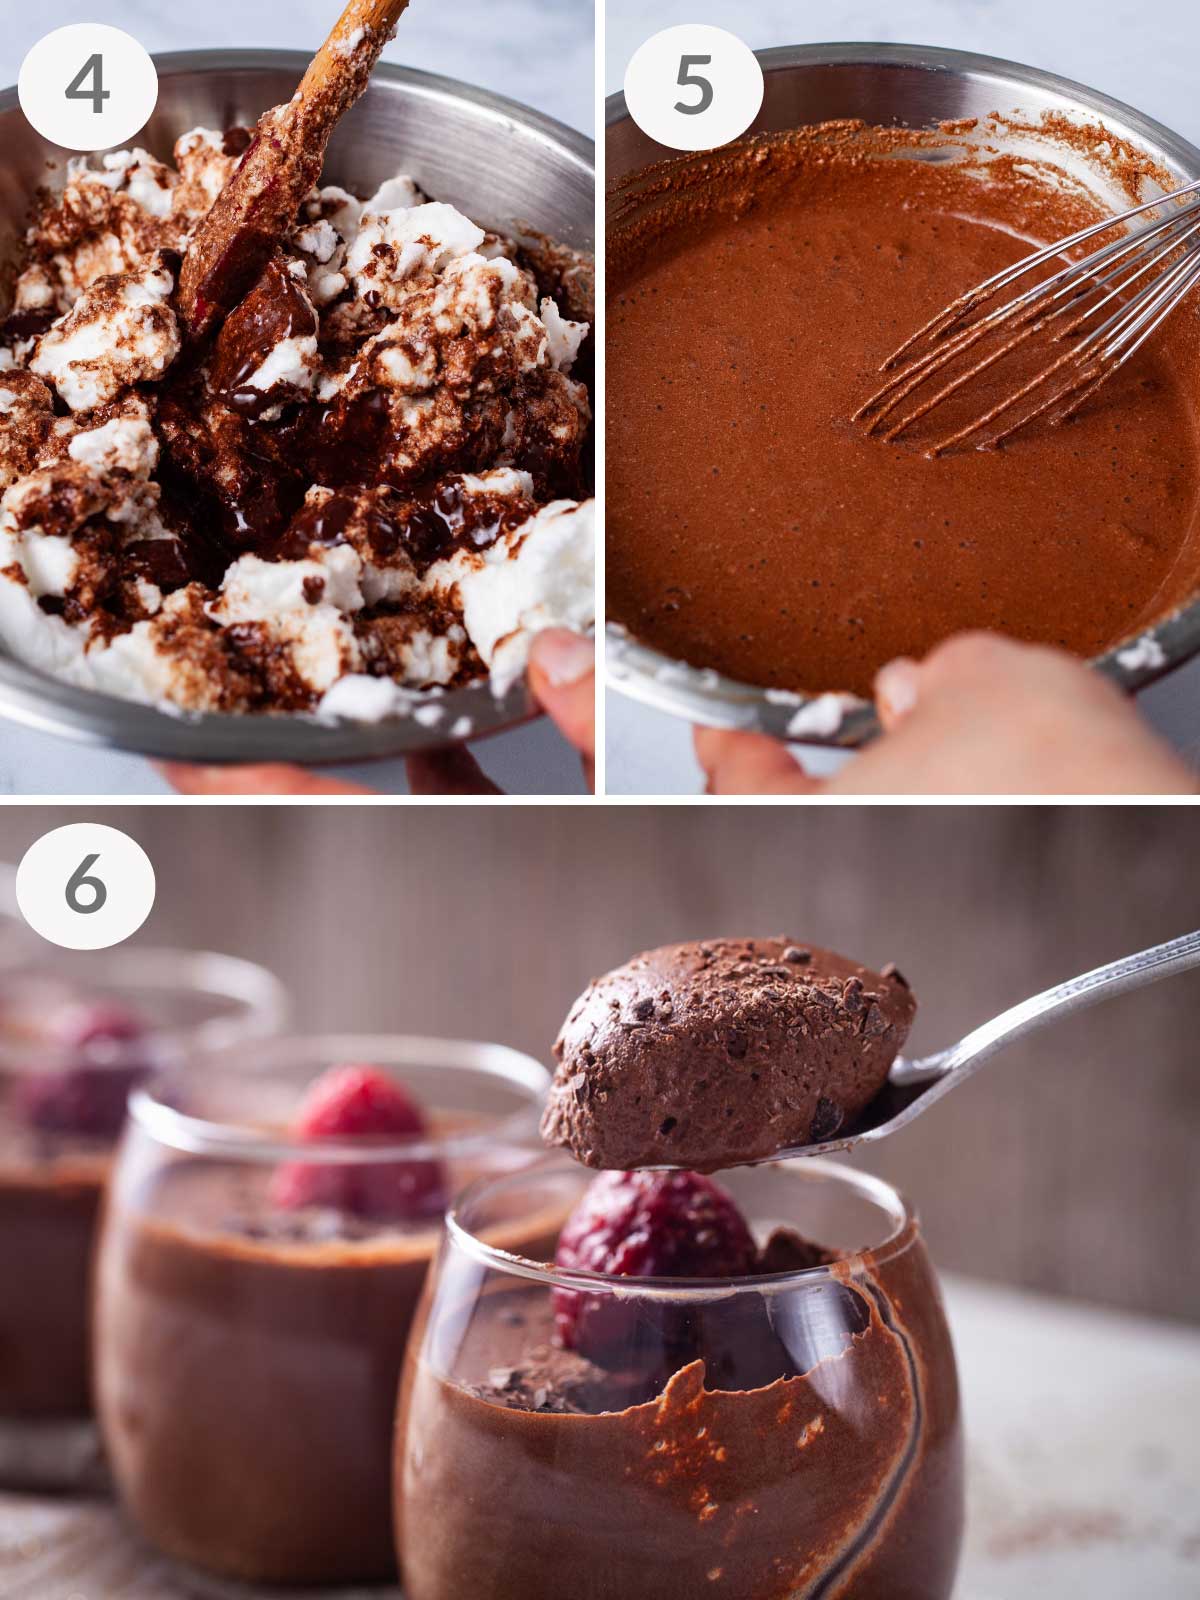
Step Four (Picture 4 above) - Gently fold small amounts of the chocolate mixture into the beaten egg whites with a spatula. It will give the foam the proper time to temper and adjust to the chocolate base.
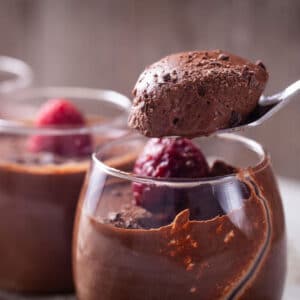
Step Five (Picture 5 above) - Gently blend everything until you get a uniform and beautiful brown mixture with a creamy texture.
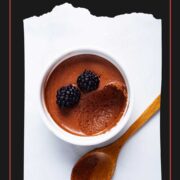
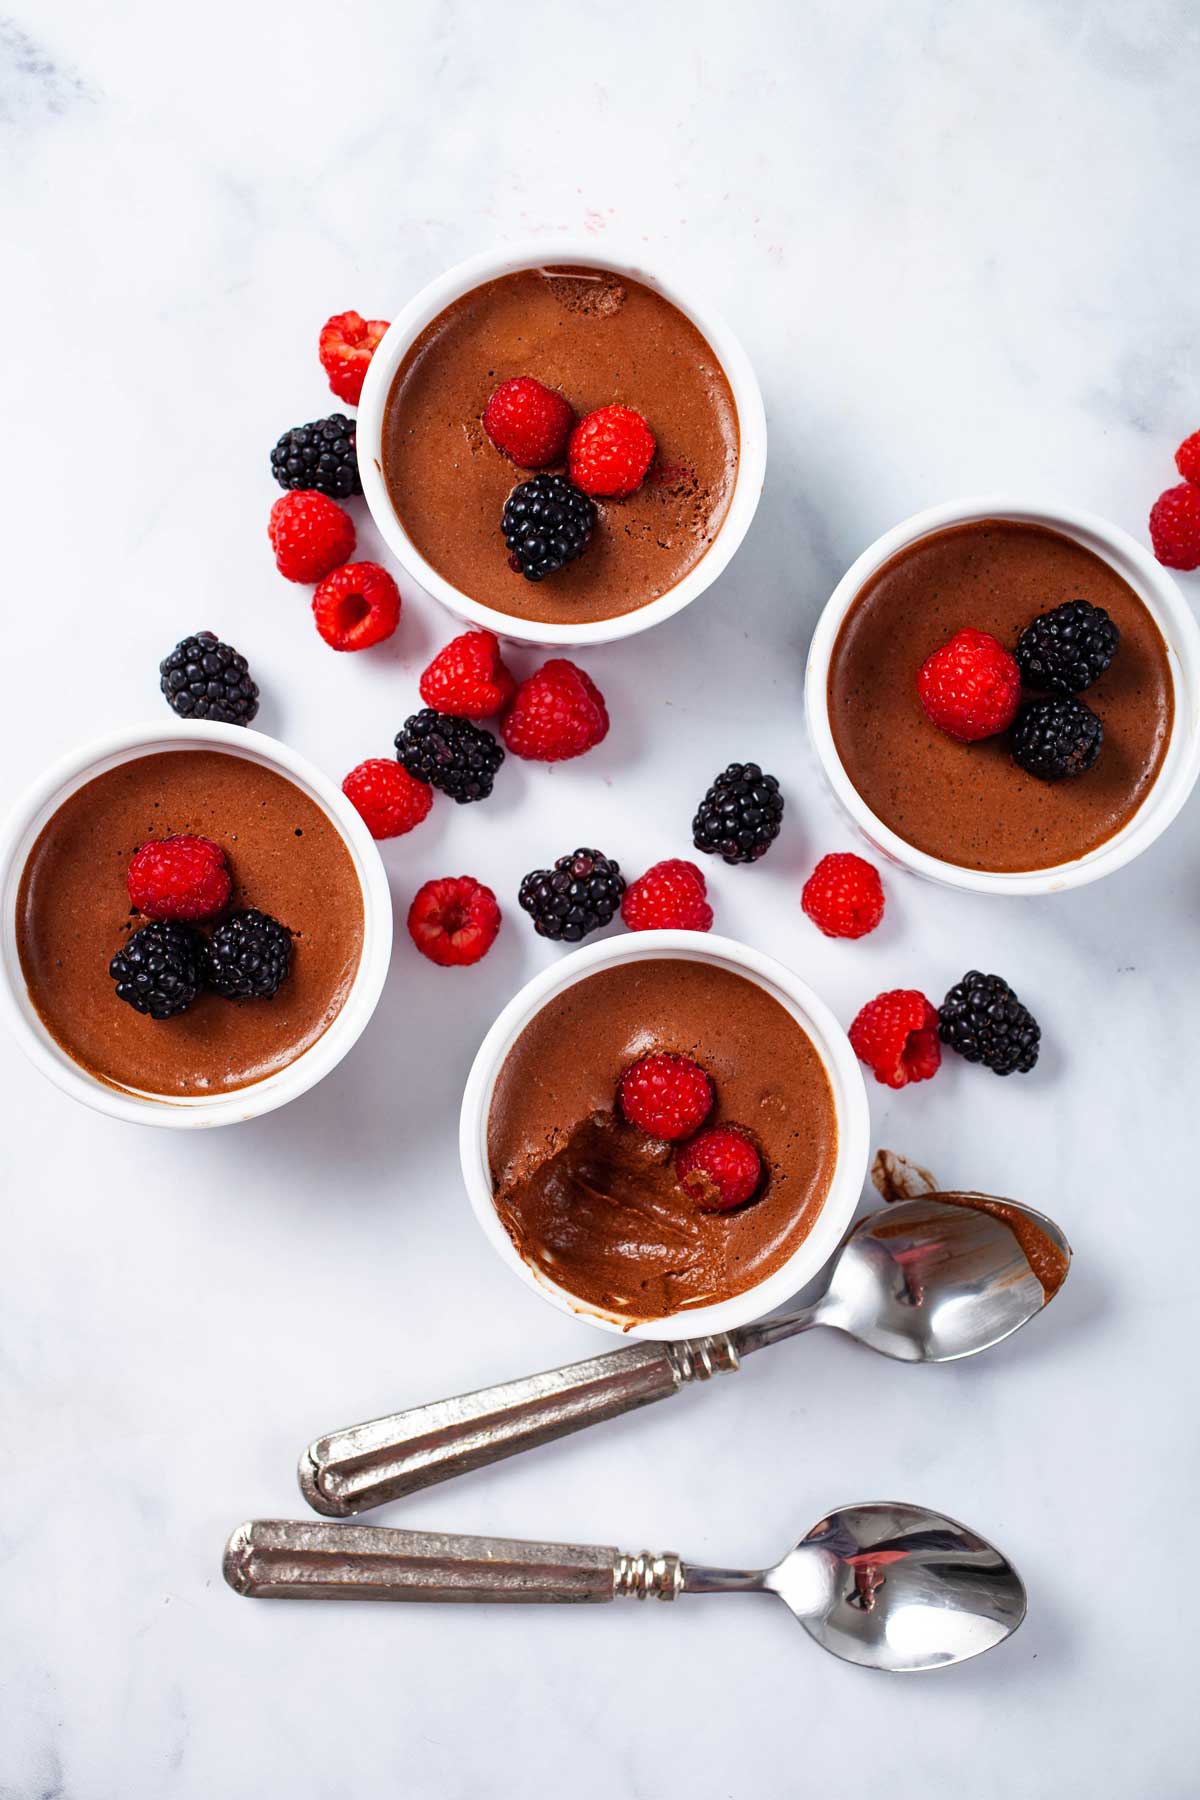
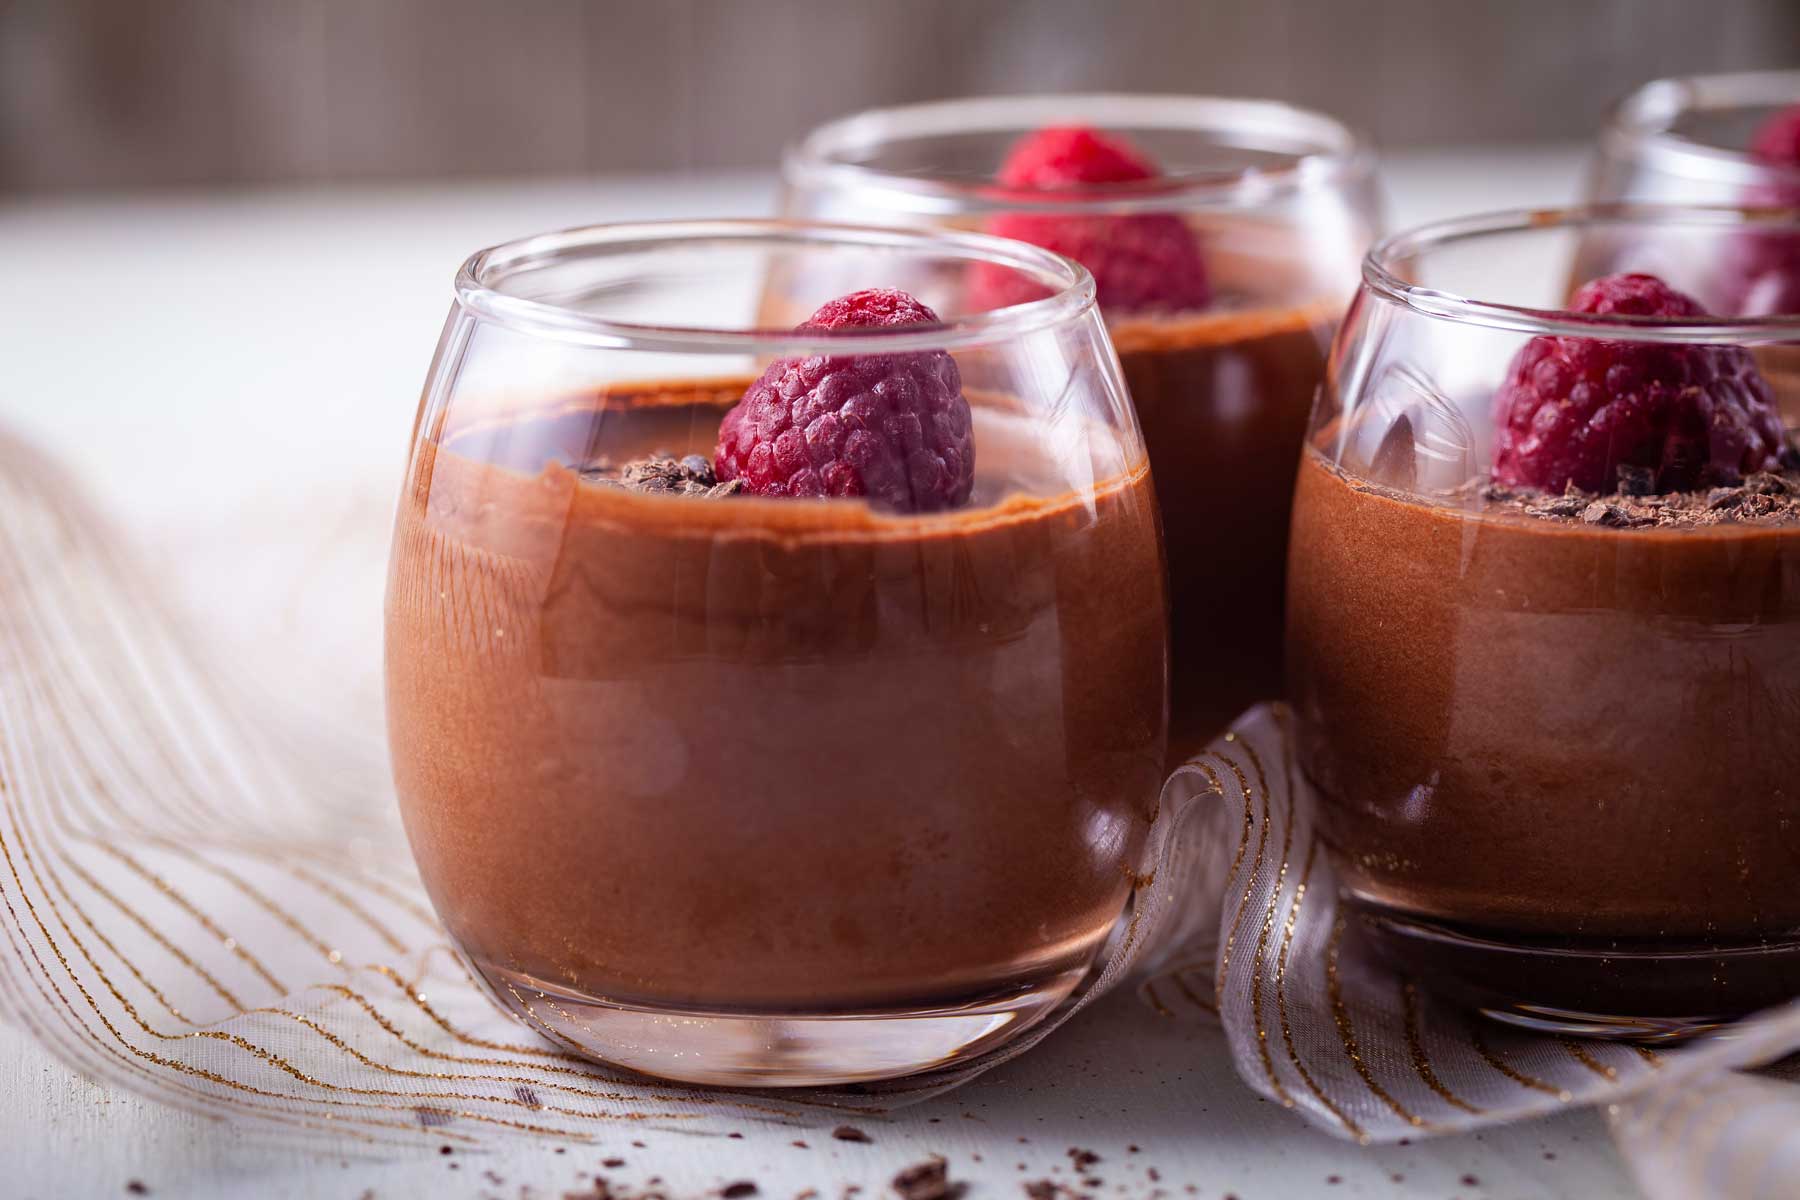
Step Six (Picture 6 above) - Divide mousse equally into small cups of your choice for individual servings. Chill in the refrigerator for at least 30 minutes or let sit overnight to get a beautiful mousse texture.
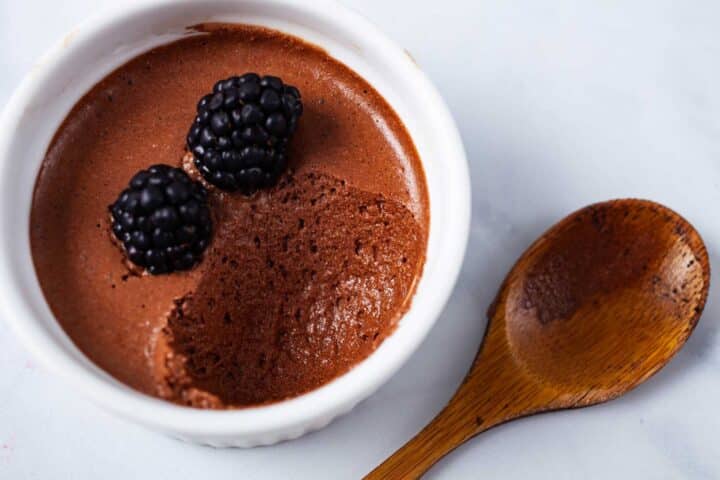
When ready to serve, garnish with berries and extra chocolate shavings.
Helpful Tips
- Melting the chocolate: Continuously stir while melting the chocolate because it can burn quickly. You have to stay with it to get that smooth, glowy paste infused with coffee and maple syrup. There is no need to cool the mixture completely. Instead, let it sit off the stove while tending the egg whites.
- Creating stiff peaks: It is super easy when using a stand mixer or electric whisk. However, I have whisked it by hand before—in case you want to test your arm strength, go for it. The key to a stable white foam with beautiful peaks is to use either a glass or large metal bowl and wipe it thoroughly clean first. Trust me, any dust, wet, or fatty particles in it will prevent the egg whites from stiffening.
- Folding in the chocolate: Use a whisk or rubber spatula and go gently. Don't overmix here, and work fast yet smoothly because you don't want the foam to deflate too much (it is the only aerator in this recipe giving this mouse its airy texture). Going gently will also give the foam the proper time to temper and adjust to the chocolate base. Always fold in by hand to get a uniform and beautiful brown mix—never use an electric mixer at this stage.
- Chilling: Ensure that you portion the mousse into your desired serving cups as soon as it is made and before it's set and chilled. It will be runny enough to do so. Use a spoon or a pastry bag to simplify things (not necessary). Then place it in the fridge to chill.
Substitutions and Dietary Alternatives
- Switch up the flavors: Choose a bar of flavored chocolate. Almond, hazelnut, vanilla, and mint-flavored chocolate work well with coffee.
- Keep it dairy-free and low-carb or keto-friendly: Choose a chocolate brand that uses cocoa butter and no added sugar—I'm suggesting some of my favorites in the recipe notes. Also, replace maple syrup with a maple syrup alternative (see recipe notes).
- Love vanilla or a hazelnut-flavored cup of Joe? Go ahead—it works great in this coffee mousse recipe!
Serving Suggestions
Here are just a few of my favorite ways to serve this chocolate coffee mousse.
- Sweet cherries
- Almond slices (if no nut allergies)
- Strawberries, blackberries
- Chocolate shavings
Recipe FAQs
It only takes about 30 minutes to one hour, but I always let it cool for a bit longer—about two hours to obtain a beautiful, light, and fluffy texture.
If you want to prepare this sweet treat the day before your event, let it sit overnight for a do-ahead dessert.
It will keep well for a few days—up to 4 days max.
You can store the yolks in a small airtight container for up to two days in the fridge and easily incorporate them into an omelet, egg muffins, pancake mix, mascarpone mousse, or homemade mayonnaise—or work the egg yolks into some plant milk as the base for a lighter egg dish (these are just a few easy options).
You Might Also Like


Made this? Tell me how it went in the comments and leave a star rating below. I love to hear from you. And don't forget to subscribe to my monthly newsletter! — Mariska
Have questions? Simply comment below or message me. If you make this recipe, please leave a comment and a starred review below. Thank you!
I have made this chocolate coffee mousse numerous times—for fancy occasions or low-key get-togethers.
And it is always a dessert that doesn't disappoint. So now it is your turn to make this mousse recipe and make it your own. Enjoy!
Don't forget to also check out these easy and healthy coffee dessert recipes for all occasions.
📖 Recipe
5-Ingredient Easy Chocolate Coffee Mousse
Mariska RamondinoIngredients
- 1 cup dark 56% to 80% semi-sweet chocolate, broken into pieces, at room temperature, plus extra for garnish 155 grams
- 1 tablespoon maple syrup or alternative to keep it Keto-friendly
- ½ cup brewed coffee 90ml
- 4 egg whites at room temperature
- Fresh or frozen raspberries/blackberries to garnish
Instructions
- Place a small saucepan over very low heat and add the chocolate. When the chocolate starts melting, pour in the maple syrup and the coffee.1 cup dark 56% to 80% semi-sweet chocolate, broken into pieces, at room temperature, plus extra for garnish, 1 tablespoon maple syrup, ½ cup brewed coffee
- Stir continuously until the ingredients are well combined and all the chocolate is completely melted—you should have a shiny dark chocolate paste. Remove from heat; reserve.
- Using a stand mixer or electric hand mixer on medium to high speed, beat the egg whites until stiff peaks form (4 to 5 minutes).4 egg whites at room temperature
- Use a (rubber) spatula to scrape the reserved chocolate mixture from the pan and add it to the beaten egg whites in thirds.
- At first, gently fold in the mix for a few seconds, then use a regular whisk and gently stir until everything is thoroughly blended and you have a beautiful brown mousse. Note: don't overmix here. It is important to work quickly but not vigorously, so the peaked egg whites won't deflate too much.
- Divide the mousse evenly into 4 small cups, ramekins, or serving bowls.
- Chill in the refrigerator for at least 30 minutes (I usually let it sit for 2 hours, or you can let it sit overnight.)
- When ready to serve, garnish with a raspberry and extra chocolate shavings.Fresh or frozen raspberries/blackberries to garnish
Notes
Add your own private notes
Whenever you come back to this recipe, you’ll be able to see your notes.
Nutrition (% Daily value)
Disclaimer: This nutritional data is calculated using third party tools and is only intended as a reference.
Terry says
This says 4 servings, but what size servings?
Mariska says
Hi Terry, it's about a cup per serving;)
Lindsey J // BRAVE LIFESTYLE BLOG says
You had me at brewed coffee! I like the limited ingredients in this fancy dessert.
Kelsey Harmony says
Yum, this looks incredible!! I love dark chocolate so I will have to give this a try!
Mariska says
Thank you, Kelsey!
Morgan says
This looks incredible! I was just looking for dessert ideas for a dinner party I'm hosting soon so I might have to give this a try!
Mariska says
Hi, Morgan. This one is perfect for dinner parties because it is so easy to make. Thanks for stopping by!
Krissy says
WOW! This looks sinfully delicious! I will have to add this to my recipes and whip this up one day! Thanks for sharing 🙂
Mariska says
Thank you, Krissy!