
Here is an easy skincare recipe that will give you glowing, nourished skin in minutes. It's an ice cube facial and hydrating yogurt mask wrapped up in one simple homemade skin care solution.
I have shared this beauty recipe so many times, and everyone loves this facial remedy no matter their skin type.
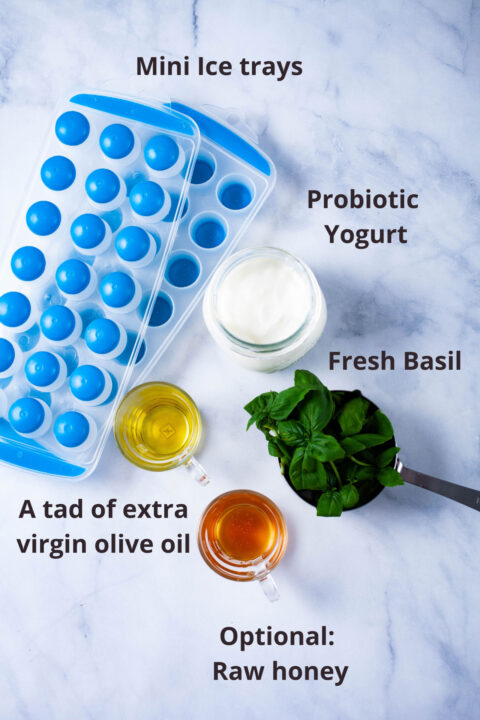
It is one of the most straightforward natural beauty preparations I regularly use at home to supplement my skincare routine, and you'll only need four ingredients to make them.
A homemade skin care recipe
Admittingly, I can sometimes geek out about promising skincare brands and emerging trends. And although I am pretty loyal to certain products I regularly rotate, that doesn't stop me from trying something new now and then.
And some things stick around, like rubbing ice cubes on my face. So it's an old beauty tip that immediately made sense to me as someone who loves taking daily cold showers for years.
But, I love to infuse my facial ice cubes with a few pure kitchen ingredients that individually have always worked for my skin.
It's a simple beauty routine packed with so many benefits, and I know from sharing this recipe amongst friends that it works on multiple skin types.
This homemade formula is a keeper because:
- It addresses a couple of skin symptoms all at once;
- Plus, it's a straightforward 4-ingredient recipe;
- It has a lovely smell and double-duty as a face mask;
- And it quickly can give your skin a soft, peach-like complexion.
This nourishing DIY skincare recipe is easy and so worth making.
Benefits of Ice cube facial and moisturizing DIY face mask
Rubbing my clean face with an infused ice cube facial is usually my go-to ritual after an intense early morning workout—that's when I look like a walking tomato. But that doesn't mean that I want to have that more-than-normal-red complexion for the rest of the day.
- An ice cube facial just immediately calms my skin, and it's also great when I react to something irritant;
- It soothes and reduces any redness;
- And make my skin radiant and smooth.
- It instantly wakes up the skin and gives it a healthy glow—especially after long hours of traveling.
But it can do so much more when you infuse it with probiotic yogurt, raw honey, a tad of extra virgin olive oil, and fresh basil leaves.
These are four simple ingredients I often employ separately to either cleanse or tackle a particular skin problem. But combined and infused into an ice cube facial, they can get you maximum benefits and address multiple skin issues all at once.
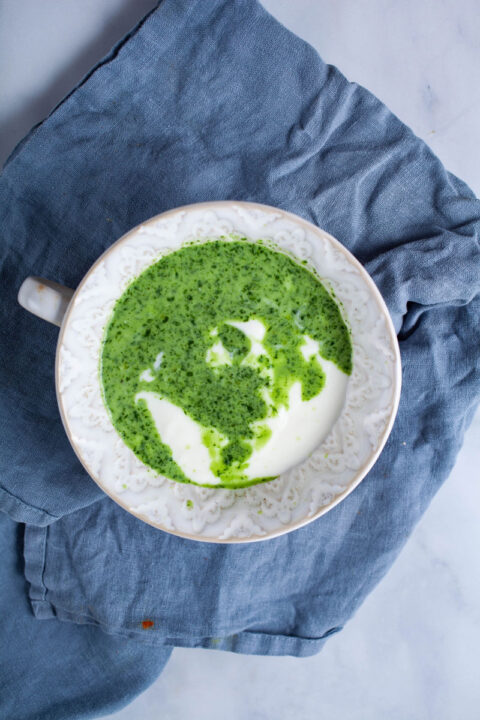
And after rubbing the ice cube on your face, the creamy consistency becomes a soothing face mask that:
- Also hydrates,
- Makes your skin incredibly soft,
- Shrinks pores,
- And firms or sculpts over time (my experience when I am consistent with using this ice facial mask).
So let's look at the ingredients!
Nourishing Ingredients for all skin types
Yogurt for face
I always have Probiotic Yogurt in my fridge because it is one of my go-to kitchen ingredients for several things:
- It soothes sunburned skin, and it is remarkably calming when immediately applied straight out of the fridge.
- I love it as a homemade exfoliation mask—the lactic acid bacteria in probiotic yogurt gently remove dead skin cells for an immediate glow afterward.
- And when mixed with a bit of olive oil, raw honey, or coconut oil, it becomes a fantastic instant moisturizer.
- Sometimes I even use it as a natural spot treatment to reduce discoloration overtime or tackle a small breakout before getting any worse.
So, mix that into an ice facial, and you get face sculpting plus a natural DYI mask that exfoliates and hydrates. What's not to love?
Which yogurt is best? Choose a plain, unflavored probiotic Bulgarian or Greek yogurt without any additives.
Basil—skin benefits
Fresh basil is undoubtedly one of my favorite herbs to use in and outside the kitchen—an anti-inflammatory and antibacterial herb.
- I make Basil tea when I have an upset stomach;
- Or add fresh shredded leaves with Epsom or magnesium salt in my bathtub—the scent is incredible. It helps with sore muscles after a workout or energizes me when tired.
- But it also soothes red skin irritations or even skin breakouts.
- And this herb gives these mini-facials a pleasant aromatic smell.
I use a handful of fresh leaves in this nourishing DYI recipe, but feel free to use more.
A tad of olive oil to improve skin complexion
Olive oil is a great natural moisturizer. I use it interchangeably with coconut oil on myself and my daughter's skin (even when she was a baby).
But be cautious using too much. Less is more here; otherwise, it can clog pores.
Test what works best for you, but I have found that a few drops are enough to reap the benefits of this oil.
For me, it reduces roughness, wrinkling, and sun damage when used consistently and adequately in this concoction.
Note: Always go for a certified cold-pressed organic extra virgin olive oil, non-GMO with no additives or preservatives—research it the same way you would for beauty products.
Raw honey for skin
I've been using honey occasionally for years to wash my face in the morning. I know it's an unusual ritual, but twice a week, I rub a small amount on my face in the morning and leave it on while making my morning drink. Then gently wash it off with water and then apply my daily moisturizer and sunscreen.
It just one of these healthy ingredients that work as a gentle and natural cleanser, balancing your skin's bacteria. And has anti-inflammatory properties that are calming and moisturizing for your skin.
I also find that it helps spot treating acne, dry areas, or appeasing fine lines, excess oil, and skin redness (like my rosacea-prone skin).
Go, if you can, for local raw honey that is as natural as possible.
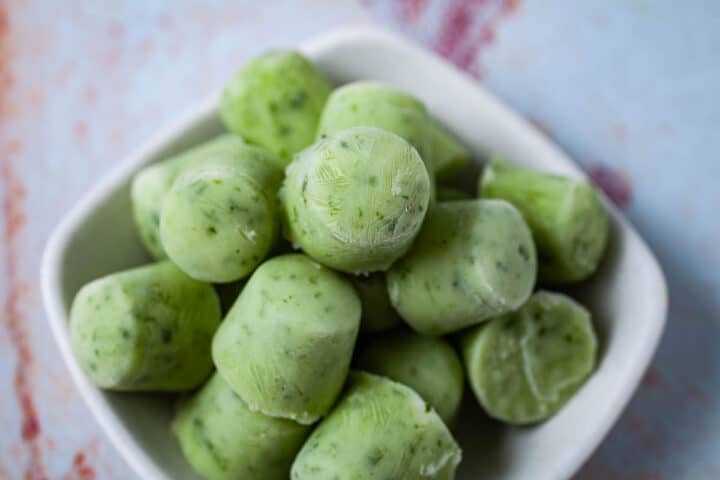
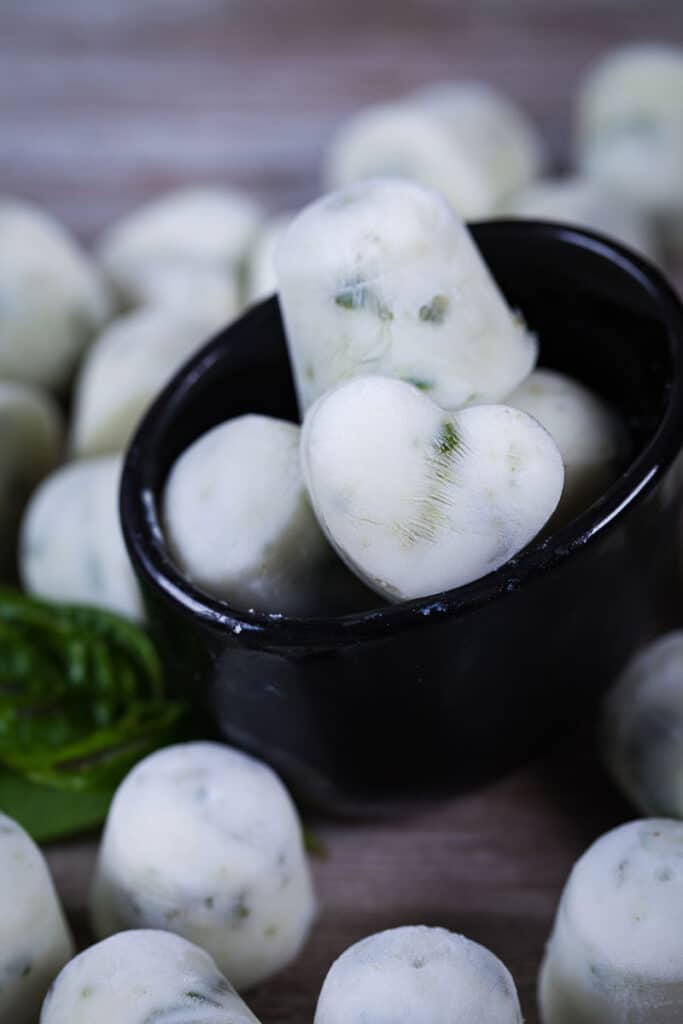
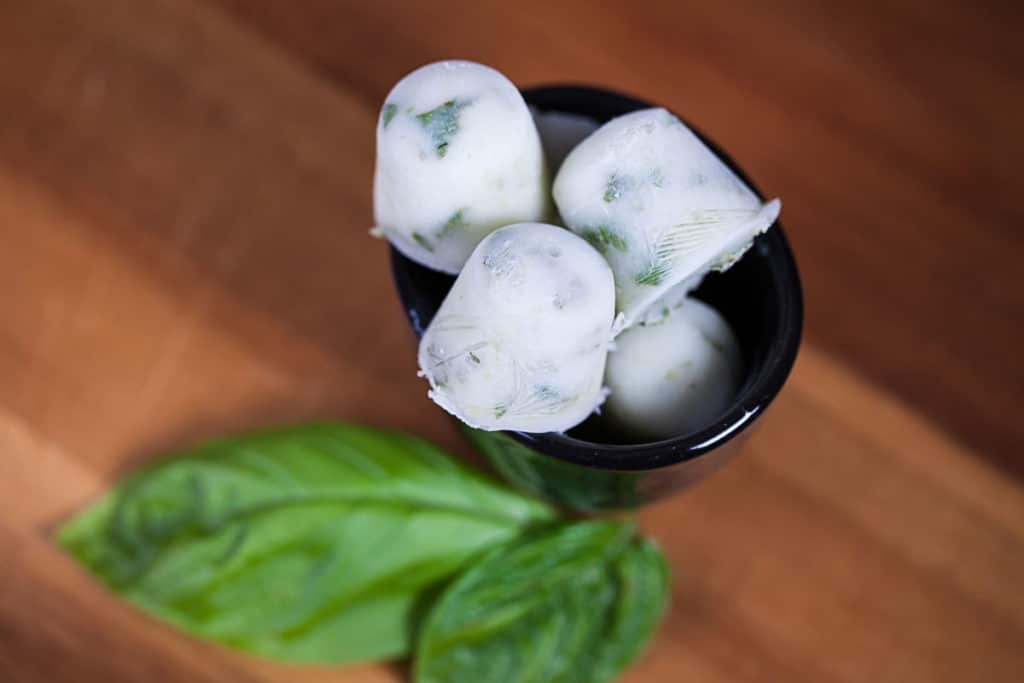
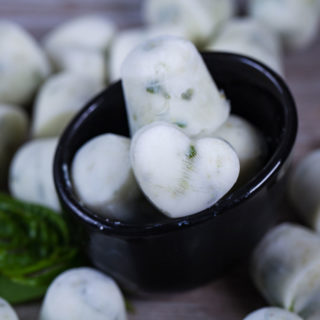
Note: These ice cube facials might look more greenish in color if you blend the Basil leaves completely with the yogurt-honey concoction. If you loosely blend the Basil leaves or shred them to release their oils and then mix them in by hand, the ice cube facials will look more white in color.
How to apply an ice cube facial and mask directly on the face
- Let a small ice cube sit on a clean kitchen towel for a minute or two.
- Then gently rub the small infused ice cube onto a clean face until completely melted.
- Start on your cheeks or the tip of your nose (areas that can handle instant cold better than your forehead) and gently massage in small circular motions touching all areas of your face.
- The warmth of your skin will dissolve the ice cube and create a creamy white, greenish mask that you then wash off after a few minutes or leave on for about 30 minutes—to soothe further and moisturize the skin. Be gentle around the eyes.
- Don't forget to target your neck and chest area.
- See full instructions below.
So carve out some time one afternoon to make this DIY ice cube facial-face mask and discover what a few fresh and simple ingredients can do for your skin. I hope you'll enjoy this homemade ice cube beauty as much as I do.
FAQ
What type of ice trays are best to make ice cube facials?
I like to use the mini ice cube trays. The size of these cubes is perfect for a single serving face mask and enough to cover the neck and chest area.
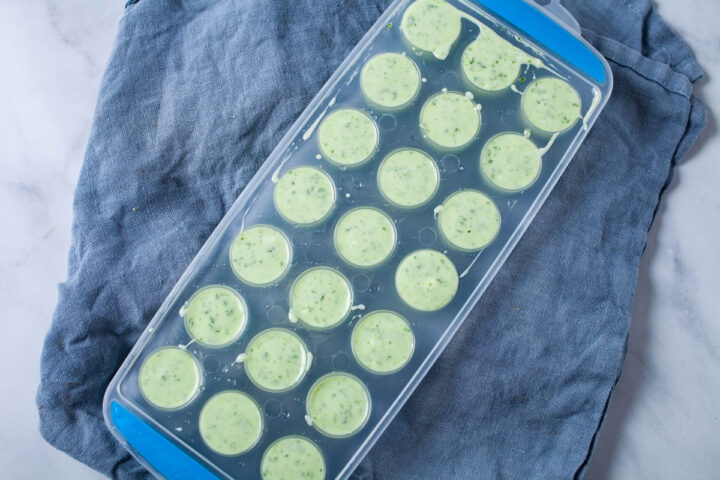
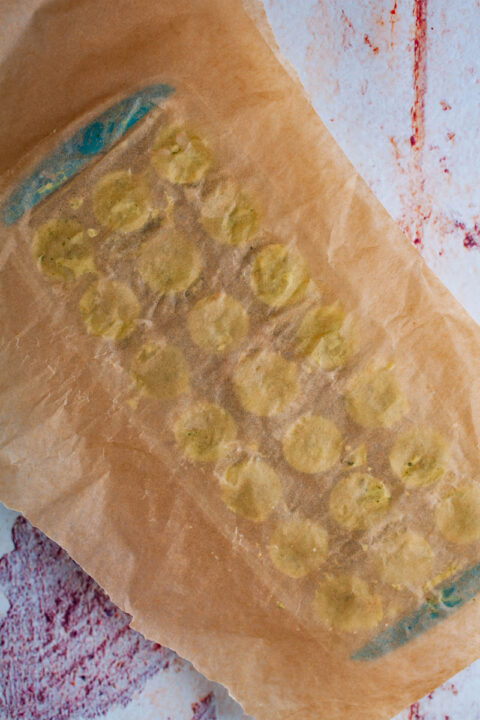
Note: most of these ice cube trays come with a spill resistant lid. If not, cover the top with parchment paper.
Can I use these infused ice facials daily?
I recommend using them once to twice per week since this is an ice facial and a face mask combined.
But feel free to use it as a spot-treatment for any skin issues when necessary—like reducing redness.
Can I apply these infused ice cubes directly to the face?
I do! I recommend leaving them in a clean bowl for a minute or two to let the cubes acclimate a bit at room temperature. And when you use them, start with an area other than your forehead.
The warmth of your skin will further melt the ice cube releasing the ingredients, leaving a nourishing mask that you can keep on for 20 to 30 minutes.
Note: always test it out on a small area behind your ear. Because what works for my skin might not always work for yours. If you feel a burning sensation or any discomfort, please stop applying the infused ice cube and consult a doctor if need be.
Do you ice your face before or after moisturizing?
I usually use them after cleansing my face and want to apply a nourishing face mask. After about 20 minutes or so, I gently wash off the yogurt concoction and directly apply a moisturizer or hydrating drops of oil.
You might also like
- Homemade morning immune and energy-boosting wellness tonics
- Three simple ingredients that can help ease bloating
Ice Cube Facial & Yogurt Face Mask
Mariska RamondinoEquipment
- 2 mini ice cube trays
Ingredients
- 1 cup probiotic yogurt
- 1 cup fresh basil leaves
- 1 teaspoon extra virgin olive oil or coconut oil
- 1 tablespoon raw honey
Instructions
How to make the facial ice cubes
- Place yogurt in a small bowl and reserve.
- Place the basil leaves, olive oil, and honey in a blender, and loosely blend to shred the basil and release their oil. If it is difficult to mix, add one tablespoon of yogurt from the reserved bowl.
- Transfer the basil mixture to the reserved bowl containing the yogurt.
- Combine everything well with the yogurt until you have a white-greenish concoction.
- Spoon the mixture into small ice cube trays (best use a small coffee spoon for this).
- Freeze for a couple of hours, and your ice cube facial masks are ready.
How to apply an ice cube facial and yogurt mask
- Cleanse your face thoroughly with a gentle and chemical-free face wash, then pat dry with a clean towel.
- Take one ice cube facial (you can pick it up using a paper towel with one side left uncovered if too cold).
- Start rubbing the uncovered side of the ice cube using small circular motions first on the cheeks. Then, very gently and with little pressure, dab the under-eye area (or try light sweeping strokes) starting from the outer corner inward.
- Then gently apply it to your neck with upward strokes.
- Proceed to your entire forehead, also using small circular motions.
- Repeat this a few times until all is used up and your whole face and neck are sufficiently covered with the white-greenish yogurt mask.
- If you have any leftovers, continue to include your chest area.
- Let the face mask sit anywhere from 20 to 40 minutes. Note that you might want to lay down or have a towel protecting your clothes—the mask will eventually dry up.
- If you have dehydrated skin, your face will absorb most of the mask.
- Finally, gently wash off anything left with water, gently pat dry your face, and use your regular moisturizer.
Notes
Add your own private notes
Whenever you come back to this recipe, you’ll be able to see your notes.
Disclaimer: This nutritional data is calculated using third party tools and is only intended as a reference.
(This post was originally published on Oct 21, 2017, and updated to include new information).
Leave a Reply